

Have you ever tried to capture the northern lights, only to end up with blurry or dark photos? It’s frustrating when your camera just won’t cooperate.
You miss the magic, and the moment feels lost. But it doesn’t have to be that way. Choosing the right camera settings can change everything. Suddenly, your photos come alive with color and light. The northern lights become something you can hold onto, not just a memory.
I’ll share simple tips and the best camera settings to make your shots stunning. Plus, i’ll recommend some great products that make this easier. If you want to finally get those perfect northern lights photos, keep reading. You’re about to turn those frustrating nights into beautiful memories.
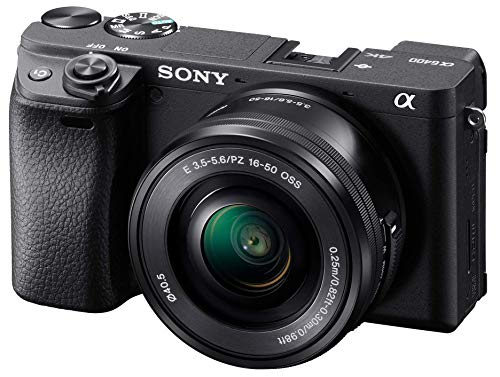
1. Sony Alpha a6400 Mirrorless Camera: Compact APS-C Interchangeable Lens Digital Camera with Real-Time Eye Auto Focus, 4K Video, Flip Screen & 16-50mm Lens – E Mount Compatible – ILCE-6400L/B, Black
- Brand: Sony
- Manufacturer: Sony
- Color: Black
- Dimensions: Height: 4.55 inches Width: 9.2 inches Length: 6.2 inches Weight: 0.64375 pounds `
Sony Alpha a6400 offers sharp images with its APS-C sensor and fast Real-Time Eye Autofocus. Recording 4K videos is smooth and clear, perfect for creative projects. The flip screen helps capture selfies and tricky angles easily. Compact design fits well in your hand or bag for travel and daily use. Compatible with many E-mount lenses, it gives flexibility for different photo styles.
Advantages
- Compact design makes it easy to carry anywhere.
- Real-Time Eye Auto Focus captures sharp portraits quickly.
- 4K video records clear and detailed footage.
- Flip screen helps frame shots from different angles.
- Compatible with many lenses for versatile photography.
Disadvantages
- Battery life is short, requiring frequent recharging during use.
- Built-in flash is weak and not suitable for low light.
- No headphone jack limits audio monitoring during video recording.
- The menu system can be confusing for beginners.
- Kit lens offers limited zoom and image quality.
Our Recommendations
Sony Alpha a6400 takes sharp photos with fast Real-Time Eye Auto Focus. Perfect for both beginners and hobbyists. The flip screen helps capture selfies and vlogs easily. 4K video quality is clear and smooth. Compact size makes it easy to carry everywhere. The 16-50mm lens covers many shooting needs. Battery life lasts long enough for daily use. Controls are simple and easy to learn. Great for travel, family, and fun photography. A solid choice for anyone wanting good pictures and videos.

2. AKASO V50X Native 4K30fps WiFi Action Camera with EIS Touch Screen 4X Zoom 131 feet Waterproof Camera Support External Mic Remote Control with Helmet Accessories (Without 64GB MicroSD Card)
- Brand: AKASO
- Manufacturer: AKASO
- Dimensions: Height: 1.181102361 inches Width: 1.574803148 inches Length: 2.362204722 inches Weight: 1.1904962148 pounds `
Capture every adventure in clear 4K resolution with the AKASO V50X action camera. Its built-in EIS keeps videos smooth even in motion. The touch screen and 4X zoom make framing shots easy and precise. Waterproof up to 131 feet, it handles underwater fun without worry. External mic support and remote control add more ways to record. Helmet accessories come included for hands-free filming.
Advantages
- Captures clear 4K videos with smooth electronic image stabilization.
- Touch screen makes camera settings and playback quick and easy.
- Waterproof design works well for underwater adventures up to 131 feet.
- Supports external microphone for better sound quality in recordings.
- Comes with remote control and helmet accessories for hands-free use.
Disadvantages
- Battery life is short during continuous 4K recording.
- No memory card included, must buy separately.
- Touch screen can be unresponsive in cold weather.
- External mic requires additional purchase and setup.
- Waterproof depth limited to 131 feet only.
Our Recommendations
The AKASO V50X camera captures clear 4K videos with smooth image stabilization. Its touchscreen is easy to use, making settings simple to change. Zooming in up to 4 times helps get closer shots without losing quality. Waterproof up to 131 feet, it works well for underwater adventures. The camera supports an external mic, which improves sound quality during recording. Remote control and helmet accessories add great convenience for action sports. Battery life lasts long enough for a full day of filming fun. Compact and lightweight, this camera is easy to carry anywhere. Overall, it delivers good value for its price and features.

3. Pawmendous Bird Feeder with Camera – AI Identifies 10,000+ Birds, Real-Time Alerts & Two-Way Audio – Solar & Wired Powered, IP65 Waterproof for Backyard, Garden, Patio – Ideal for Bird Lovers
- Brand: Pawmendous
- Manufacturer: Hangzhou Chenxu Light Science Co., LTD
- Color: Olive & Brown
- Dimensions: Height: 9.05 inches Width: 7.67 inches Length: 8.46 inches
Enjoy watching birds up close with the Pawmendous Bird Feeder with Camera. It uses AI to identify over 10,000 bird species quickly. Receive real-time alerts and talk to birds using two-way audio. Powered by solar or wired energy, it fits any outdoor space. Built with IP65 waterproof design, it stands up to all weather. Perfect for anyone who loves nature and bird watching.
Advantages
- AI technology identifies over 10,000 bird species quickly and accurately.
- Real-time alerts notify you when birds visit your feeder.
- Two-way audio lets you listen and talk to birds nearby.
- Solar and wired power options keep the feeder running nonstop.
- IP65 waterproof design ensures durability in all weather conditions.
Disadvantages
- Battery life may drain quickly without enough sunlight.
- AI sometimes misidentifies similar-looking bird species.
- Wired setup can limit feeder placement options.
- Two-way audio might pick up background noise often.
- Camera quality lowers in poor or low light.
Our Recommendations
The Pawmendous Bird Feeder with Camera brings nature closer right to my backyard. It identifies over 10,000 bird species with ease. Real-time alerts notify me whenever a bird visits, which is very exciting. The two-way audio lets me talk to the birds, adding more fun to bird watching. Solar and wired power options give great flexibility for different setups. Its IP65 waterproof design holds up well in rain and wind. A perfect choice for anyone who loves watching birds daily. Easy to install and use, making bird feeding simple and enjoyable.
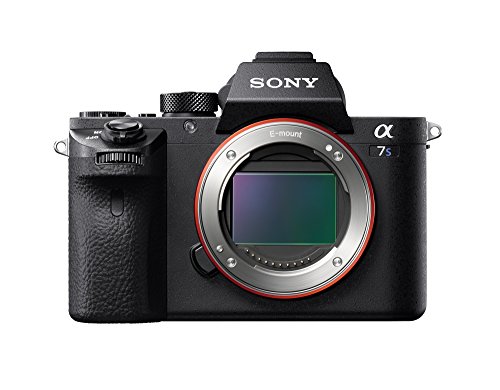
4. Sony a7S II ILCE7SM2/B 12.2 MP E-mount Camera with Full-Frame Sensor, Black
- Brand: Sony
- Manufacturer: Sony
- Color: Black
- Dimensions: Height: 5.67 inches Width: 6.1 inches Length: 9.61 inches Weight: 1.0 pounds `
Sony a7S II ILCE7SM2/B offers excellent low-light performance with its full-frame sensor. The 12.2 MP resolution captures clear and detailed images. It features a fast E-mount lens system for versatile shooting. Video recording is smooth and professional with 4K capabilities. Compact and lightweight, this camera fits well in your hands for easy use. Perfect for photographers and videographers seeking quality and reliability.
Advantages
- Captures clear images even in very low light conditions.
- Full-frame sensor gives sharp and detailed photos.
- Lightweight design makes it easy to carry anywhere.
- Fast autofocus helps catch moments quickly and clearly.
- Records high-quality video with smooth motion and color.
Disadvantages
- Battery life drains quickly during extended video recording.
- Autofocus can struggle in low light or fast scenes.
- No touchscreen, making menu navigation less intuitive.
- Body design feels a bit bulky for handheld use.
- 12.2 MP resolution may limit large print quality.
Our Recommendations
Sony a7S II delivers excellent image quality with its full-frame sensor. Low light shots come out clear and sharp every time. The camera feels solid and fits well in hand. Autofocus works fast and keeps moving subjects in focus. Battery life lasts long enough for a full day of shooting. Easy menu system helps quickly find settings. Video recording is smooth and professional-looking. Controls are simple and easy to learn. A great choice for both photos and videos.
Frequently Asked Questions
What Iso Setting Is Best For Northern Lights Photography?
Use a high ISO setting between 800 and 3200 to capture more light. Higher ISO helps reveal the colors of the aurora but watch for noise.
How Long Should The Shutter Speed Be For Northern Lights?
Shutter speed should range from 5 to 25 seconds depending on aurora brightness. Longer exposure brightens the image but may blur fast movements.
Which Aperture Setting Works Well For Northern Lights Photos?
Use a wide aperture like f/2. 8 or lower to let in more light. A wider aperture helps capture clear, bright Northern Lights in dark skies.
What White Balance Setting Suits Northern Lights Photography?
Set white balance to daylight or auto for natural colors. Adjusting white balance can prevent the aurora from looking too green or blue.
Buying Guide On Best Camera Settings For Northern Lights
1. Choose the Right Camera Mode
Select manual mode to control settings yourself. This helps capture the best Northern Lights photos. Auto modes often miss the correct exposure for dark skies.
2. Set a Wide Aperture
Use a low f-number like f/2.8 or lower. This lets in more light, making the Northern Lights brighter in your photo.
3. Adjust ISO Sensitivity
Start with ISO 800 to 1600 for clear images. Higher ISO helps capture faint lights but may add noise.
4. Use a Slow Shutter Speed
Set shutter speed between 5 to 25 seconds. This allows the camera to gather enough light for vivid auroras.
5. Turn Off Flash
Flash won’t help and can ruin your shot. The Northern Lights need natural darkness to shine.
6. Use a Tripod
Keep your camera steady with a tripod. Long exposures need stability to avoid blurry pictures.
7. Focus Manually
Set focus to infinity for sharp stars and auroras. Auto-focus may struggle in low light.
8. Shoot in RAW Format
RAW files keep more detail for editing later. This helps improve colors and brightness after shooting.
9. Turn Off Image Stabilization
Disable stabilization on a tripod to avoid blurry results. Stabilization can cause slight camera movement.
10. Check Your Battery
Cold weather drains batteries fast. Carry spares and keep them warm for longer use.
Conclusion
Capturing the Northern Lights requires patience and the right camera settings. Use a wide aperture to let in more light. Set a high ISO but avoid too much noise. A slow shutter speed helps capture the movement of the lights.
Don’t forget to focus manually for clear images. A sturdy tripod is important to keep your camera steady during long exposures. Check your photos often and adjust settings as needed. Practice before your trip to feel confident with your gear.
Remember, nature is unpredictable, so stay flexible and enjoy the experience. With these simple tips, you can take stunning photos of the Northern Lights. Keep experimenting and have fun under the magical sky.
As an Amazon Associate, I earn from qualifying purchases.
