

Do you have multiple monitors but want one to be your main focus? Setting one monitor as primary can make your work smoother and your screen time more efficient.
Imagine having your important apps and notifications exactly where you want them, without the hassle of rearranging every time. In this guide, you’ll learn simple steps to make one monitor primary, so you can take control of your workspace and boost your productivity instantly.
Keep reading to discover how easy it is to set up your perfect display.
Credit: www.youtube.com
Choosing Your Primary Monitor
Choosing your primary monitor is an important step in setting up multiple displays. It decides where your taskbar and main apps show first. Picking the right screen helps you work faster and feel more comfortable.
Understanding why and how to select your main monitor makes your setup clearer. Focus on your needs and the screens available. This section guides you through the basics.
Why Set A Primary Monitor
The primary monitor shows the main desktop screen. Your taskbar and start menu appear here. Apps open first on this display. It controls where system alerts and notifications show up.
Setting a primary monitor helps organize your workspace. It reduces confusion about where windows open. Your mouse pointer starts on this screen after a reboot. It also affects full-screen apps and games.
Identifying Your Displays
Know which monitor is which before setting the primary. Go to your display settings to see numbered screens. Each number matches a physical monitor.
Look at each screen and note its number on your settings. This helps avoid mistakes when choosing the main display. Check resolution and size to pick the best one for your tasks.
Accessing Display Settings
Accessing display settings is the first step to making one monitor primary. These settings let you choose which screen shows the main taskbar and apps. You can adjust the order of your monitors here too. Both Windows and Mac have clear ways to open these settings. Let’s see how to find them on each system.
Windows Display Settings
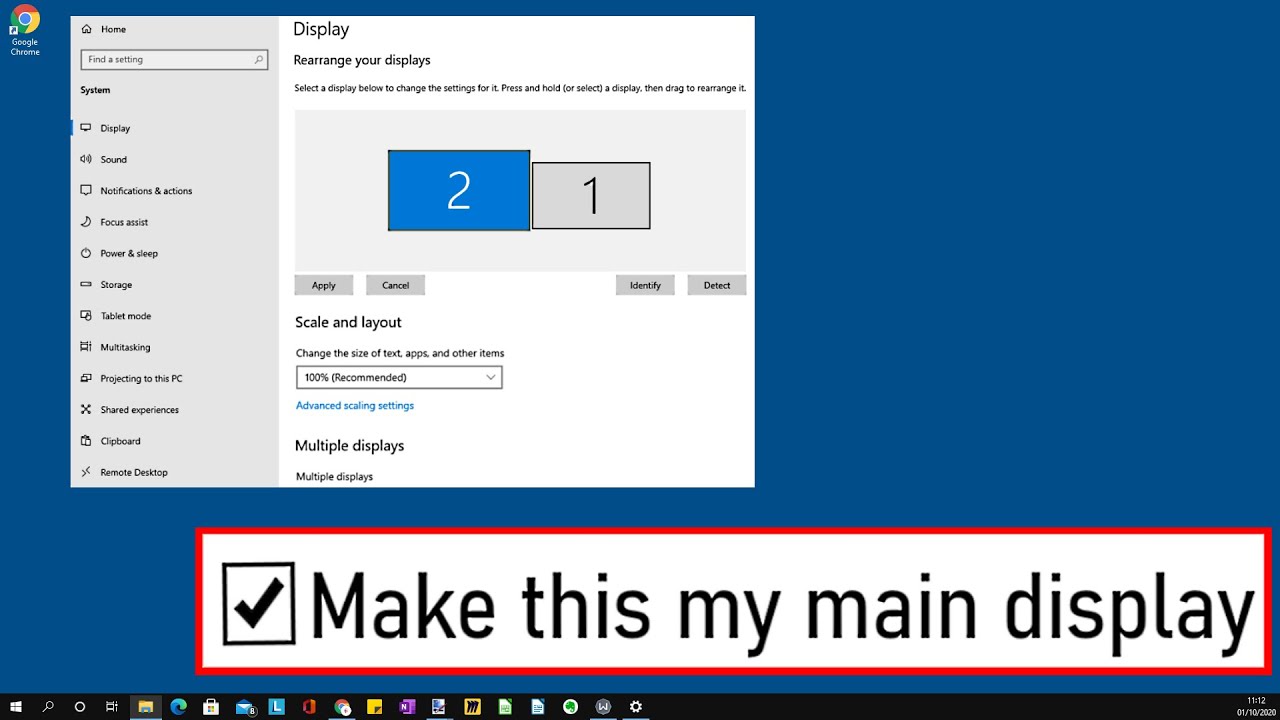
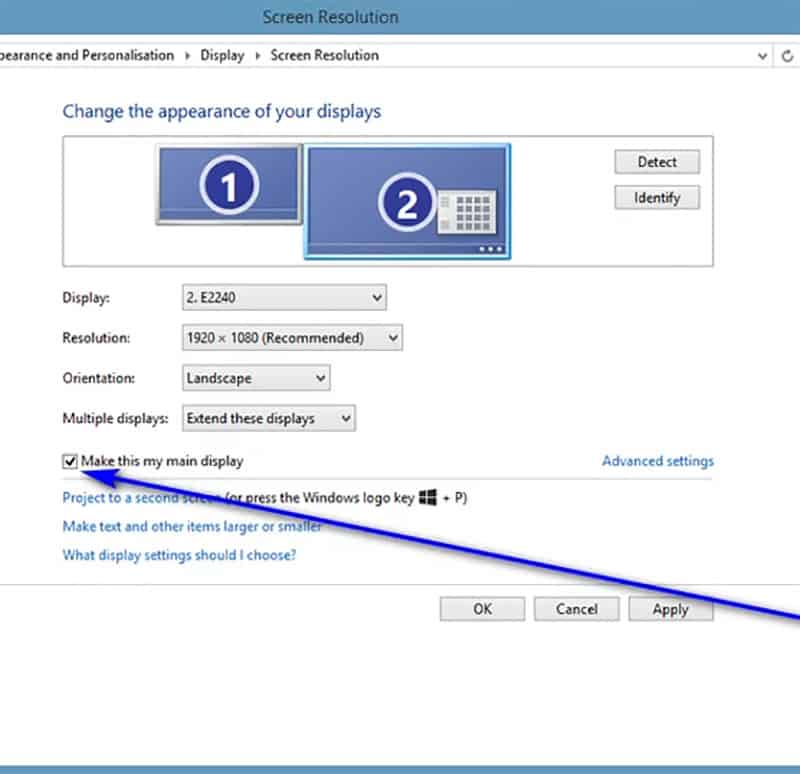
Right-click on the desktop to open a quick menu. Select “Display settings” from the list. This opens the main screen setup panel. You will see boxes representing each connected monitor. Click the monitor you want as primary. Scroll down and check “Make this my main display.” Your taskbar and new windows will move there. Click “Apply” to save changes.
Mac System Preferences
Click the Apple icon at the top left corner of your screen. Choose “System Preferences” from the drop-down menu. Select “Displays” and then click the “Arrangement” tab. You will see blue boxes for each monitor. Drag the white bar to the screen you want as primary. This sets the main display for your Mac. Close the window to save your choice.
Setting The Primary Monitor On Windows
Setting the primary monitor on Windows helps control where your taskbar and main apps appear. This step is useful if you have more than one monitor connected. You can easily switch which screen is primary without extra software. The process is quick and straightforward.
Selecting The Monitor
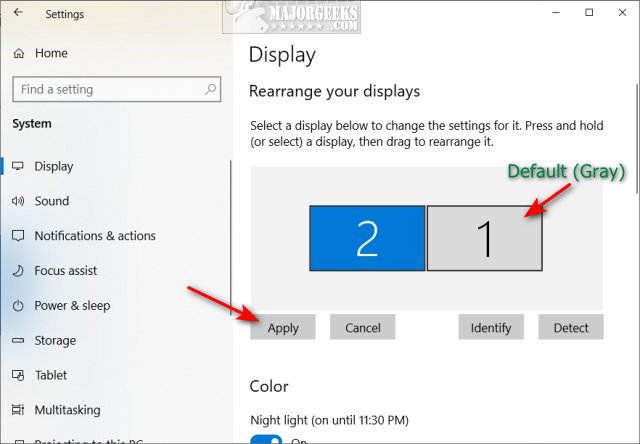
Open the Settings app on your Windows device. Click on System, then select Display. You will see numbered boxes representing your monitors. Click the box that matches the screen you want as primary. This highlights your chosen monitor.
Applying Changes
Scroll down to find the option “Make this my main display.” Check this box to set your selected monitor as primary. Click Apply to save the changes. Your taskbar and main windows will move to the chosen screen instantly.
Credit: m.majorgeeks.com
Setting The Primary Monitor On Mac
Setting the primary monitor on a Mac helps control where your main desktop and dock appear. This setting guides your Mac on which screen to use as the main display. It is useful for managing multiple monitors easily. The process is quick and simple, requiring just a few clicks.
Drag The Menu Bar
Open System Preferences and go to Displays. Click on the Arrangement tab to see the layout of your monitors. You will see a white bar at the top of one display icon. Click and drag this white bar to the screen you want as the primary monitor. This action moves the menu bar and sets the chosen monitor as primary.
Confirming The Primary Display
After dragging the menu bar, check your monitors. The dock and menu bar should appear on the new primary screen. Open an app or window to see where it opens first. This confirms the display is set correctly. Adjust the position of the monitors if needed in the Arrangement tab.
Troubleshooting Common Issues
Troubleshooting common issues can save time and reduce frustration. Setting one monitor as primary may not always go smoothly. Some problems occur more often than others. Knowing how to fix these helps keep your setup working well.
Monitor Not Detected
Sometimes the computer does not recognize the monitor. Check if cables are plugged in tightly. Try a different port or cable if possible. Restart the computer after checking connections. Update your graphics driver for better compatibility. If the monitor still is not detected, test it on another device. This helps find out if the problem is with the monitor or the computer.
Display Arrangement Problems
Screen positions may not match how monitors are placed. Open display settings to arrange monitors correctly. Drag and drop the screen icons to match physical layout. Use the “Identify” button to see which screen is which. Align edges to avoid cursor getting stuck between screens. Save changes before closing settings. This makes switching between screens smooth and natural.
Tips For Optimal Dual Display Setup
Setting up two monitors can boost your productivity and make tasks easier.
Getting the best from both screens requires some simple steps.
Small changes improve comfort and help you work faster.
Adjusting Resolution And Scaling
Check each monitor’s resolution settings. Set the highest resolution supported.
Use the display settings on your computer to adjust scaling. This makes text and icons clear and easy to read.
Matching resolution and scaling between monitors keeps a smooth visual flow.
It stops the cursor from jumping or appearing uneven when moving between screens.
Positioning Monitors Ergonomically
Place your primary monitor directly in front of you. This reduces neck strain.
Keep the secondary monitor at a slight angle. It helps easy viewing without turning your head too much.
Adjust the height so the top of each screen is at eye level.
Use monitor stands or risers to get the right height and angle for comfort.
Credit: softwareg.com.au
Frequently Asked Questions
How Do I Set One Monitor As Primary In Windows?
Go to Display Settings, select the monitor, and check “Make this my main display. ” This sets your primary screen.
Can I Change The Primary Monitor On Mac?
Yes, open System Preferences, go to Displays, then Arrangement. Drag the white menu bar to your preferred display.
Why Is My Primary Monitor Not Saving Settings?
Ensure you click “Apply” after setting the primary monitor. Update your graphics drivers if issues persist.
Does Setting A Primary Monitor Affect Gaming Performance?
Setting a primary monitor directs game display output. It can improve performance by focusing resources on one screen.
Conclusion
Setting one monitor as primary helps you work more smoothly. It shows the main taskbar and apps on that screen. You can change this anytime through your display settings. Just follow simple steps to pick the right monitor. This makes your computer easier to use every day.
Try these tips and enjoy better screen control. Your workflow will feel more organized and clear. Don’t forget to adjust settings if you add new monitors. Small changes can make a big difference in your setup.
As an Amazon Associate, I earn from qualifying purchases.

