

Have you ever wished you had proof during a tricky situation on the road? Installing a dash camera can be your best move to protect yourself and your vehicle.
But if you’re not sure where to start, don’t worry—you’re in the right place. This guide will walk you through every simple step to get your dash cam up and running quickly. By the end, you’ll have the confidence to capture every moment on the road, making your drives safer and stress-free.
Let’s dive in and get your dash camera installed the easy way!
Credit: www.youtube.com
Choosing The Right Dash Camera
Choosing the right dash camera is the first step for a safe and clear recording. It helps protect your vehicle and proves important events on the road. Picking a camera that fits your needs is key. Focus on what type fits your car and driving style. Look for features that match your daily use. Balance quality and price for the best choice.
Types Of Dash Cameras
Single-lens dash cameras record only the front view. They are easy to install and use. Dual-lens cameras capture front and rear views. This option offers more coverage for accidents. Some models include inside cabin cameras. These are helpful for rideshare drivers. Choose a type that suits your car layout and needs.
Key Features To Consider
Video quality matters for clear images. Aim for at least 1080p resolution. Night vision helps capture details in the dark. A wide-angle lens records more of the road. Look for loop recording to save space automatically. G-sensors detect impacts and save footage. GPS tracking adds location data to videos. These features improve the camera’s usefulness.
Budget And Brand Options
Dash cameras vary widely in price. Set a budget before shopping to narrow choices. Popular brands often offer reliable products and support. Lesser-known brands may provide cheaper options but less trust. Read reviews to learn about performance and durability. Find a balance between cost and quality to fit your budget.
Credit: www.youtube.com
Preparing For Installation
Preparing for the installation of a dash camera is an important step. It ensures the process goes smoothly. It also helps avoid mistakes that could damage your car or the camera. Follow these steps to get ready before starting the installation.
Gathering Necessary Tools
Collect all tools before beginning. You will need a screwdriver, a trim removal tool, and possibly a fuse tap. A cleaning cloth helps to wipe the windshield. A cable clip or adhesive tape keeps wires tidy. Having everything ready saves time and stress.
Selecting The Best Mounting Location
Choose a spot that does not block your view. The center of the windshield near the rearview mirror is ideal. Make sure the camera lens has a clear view of the road. Avoid areas with heavy glare or direct sunlight. The camera should not interfere with airbags or sensors.
Checking Vehicle Compatibility
Check if your car supports dash camera installation. Some cars have specific fuse boxes or power outlets. Verify the camera’s power needs match your car’s system. Read your vehicle manual for electrical details. Confirming compatibility prevents installation problems later.
Step-by-step Installation Guide
Installing a dash camera is easier than many think. This guide breaks down the process into simple steps. Follow each part carefully to set up your camera correctly. You will have clear video footage in no time.
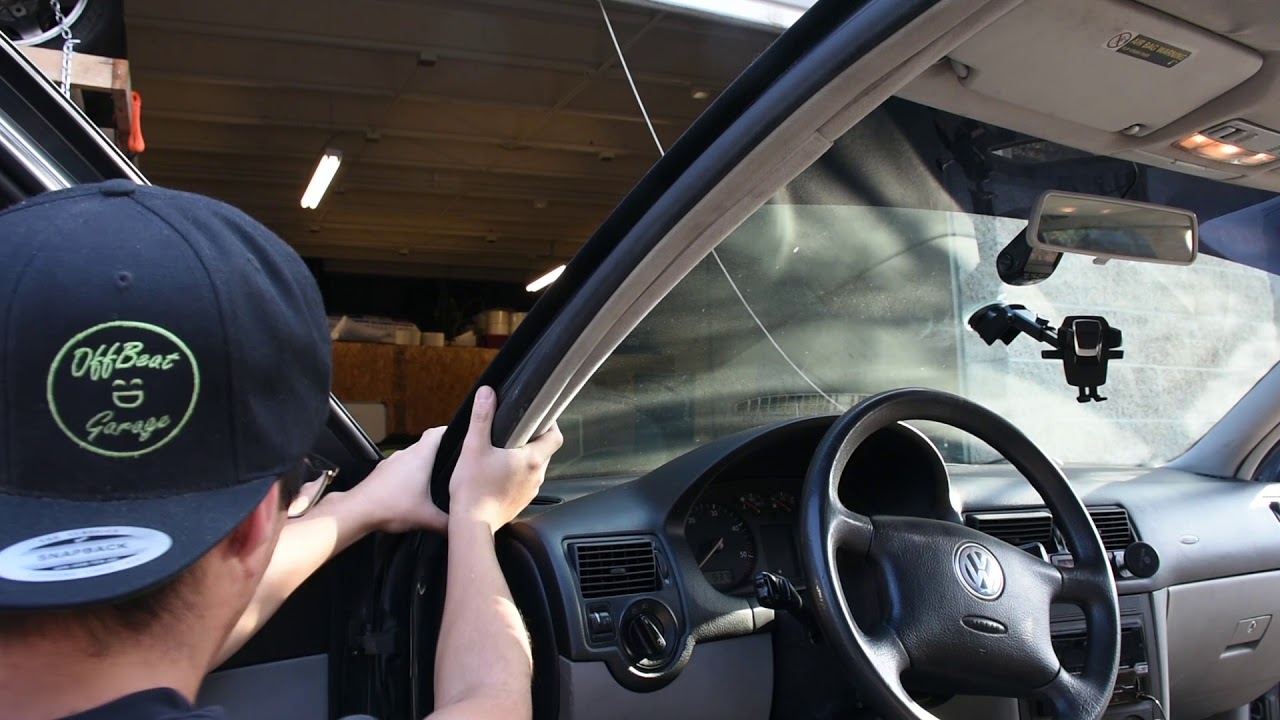
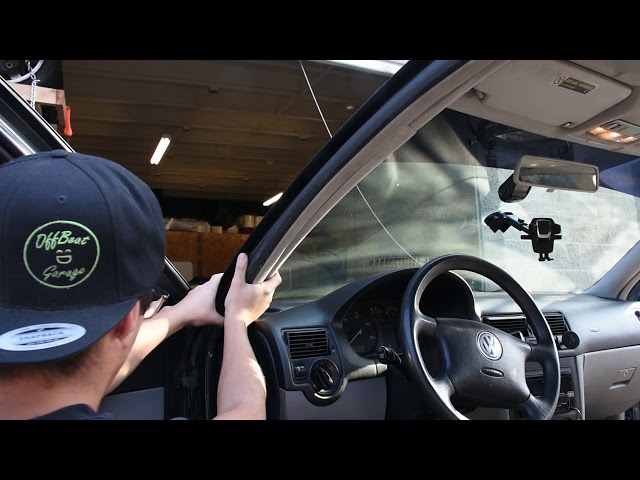
Mounting The Camera
Choose a spot behind the rearview mirror. Clean the windshield area with alcohol. Peel off the adhesive tape from the mount. Press the camera firmly against the glass. Hold it for about 30 seconds to secure it.
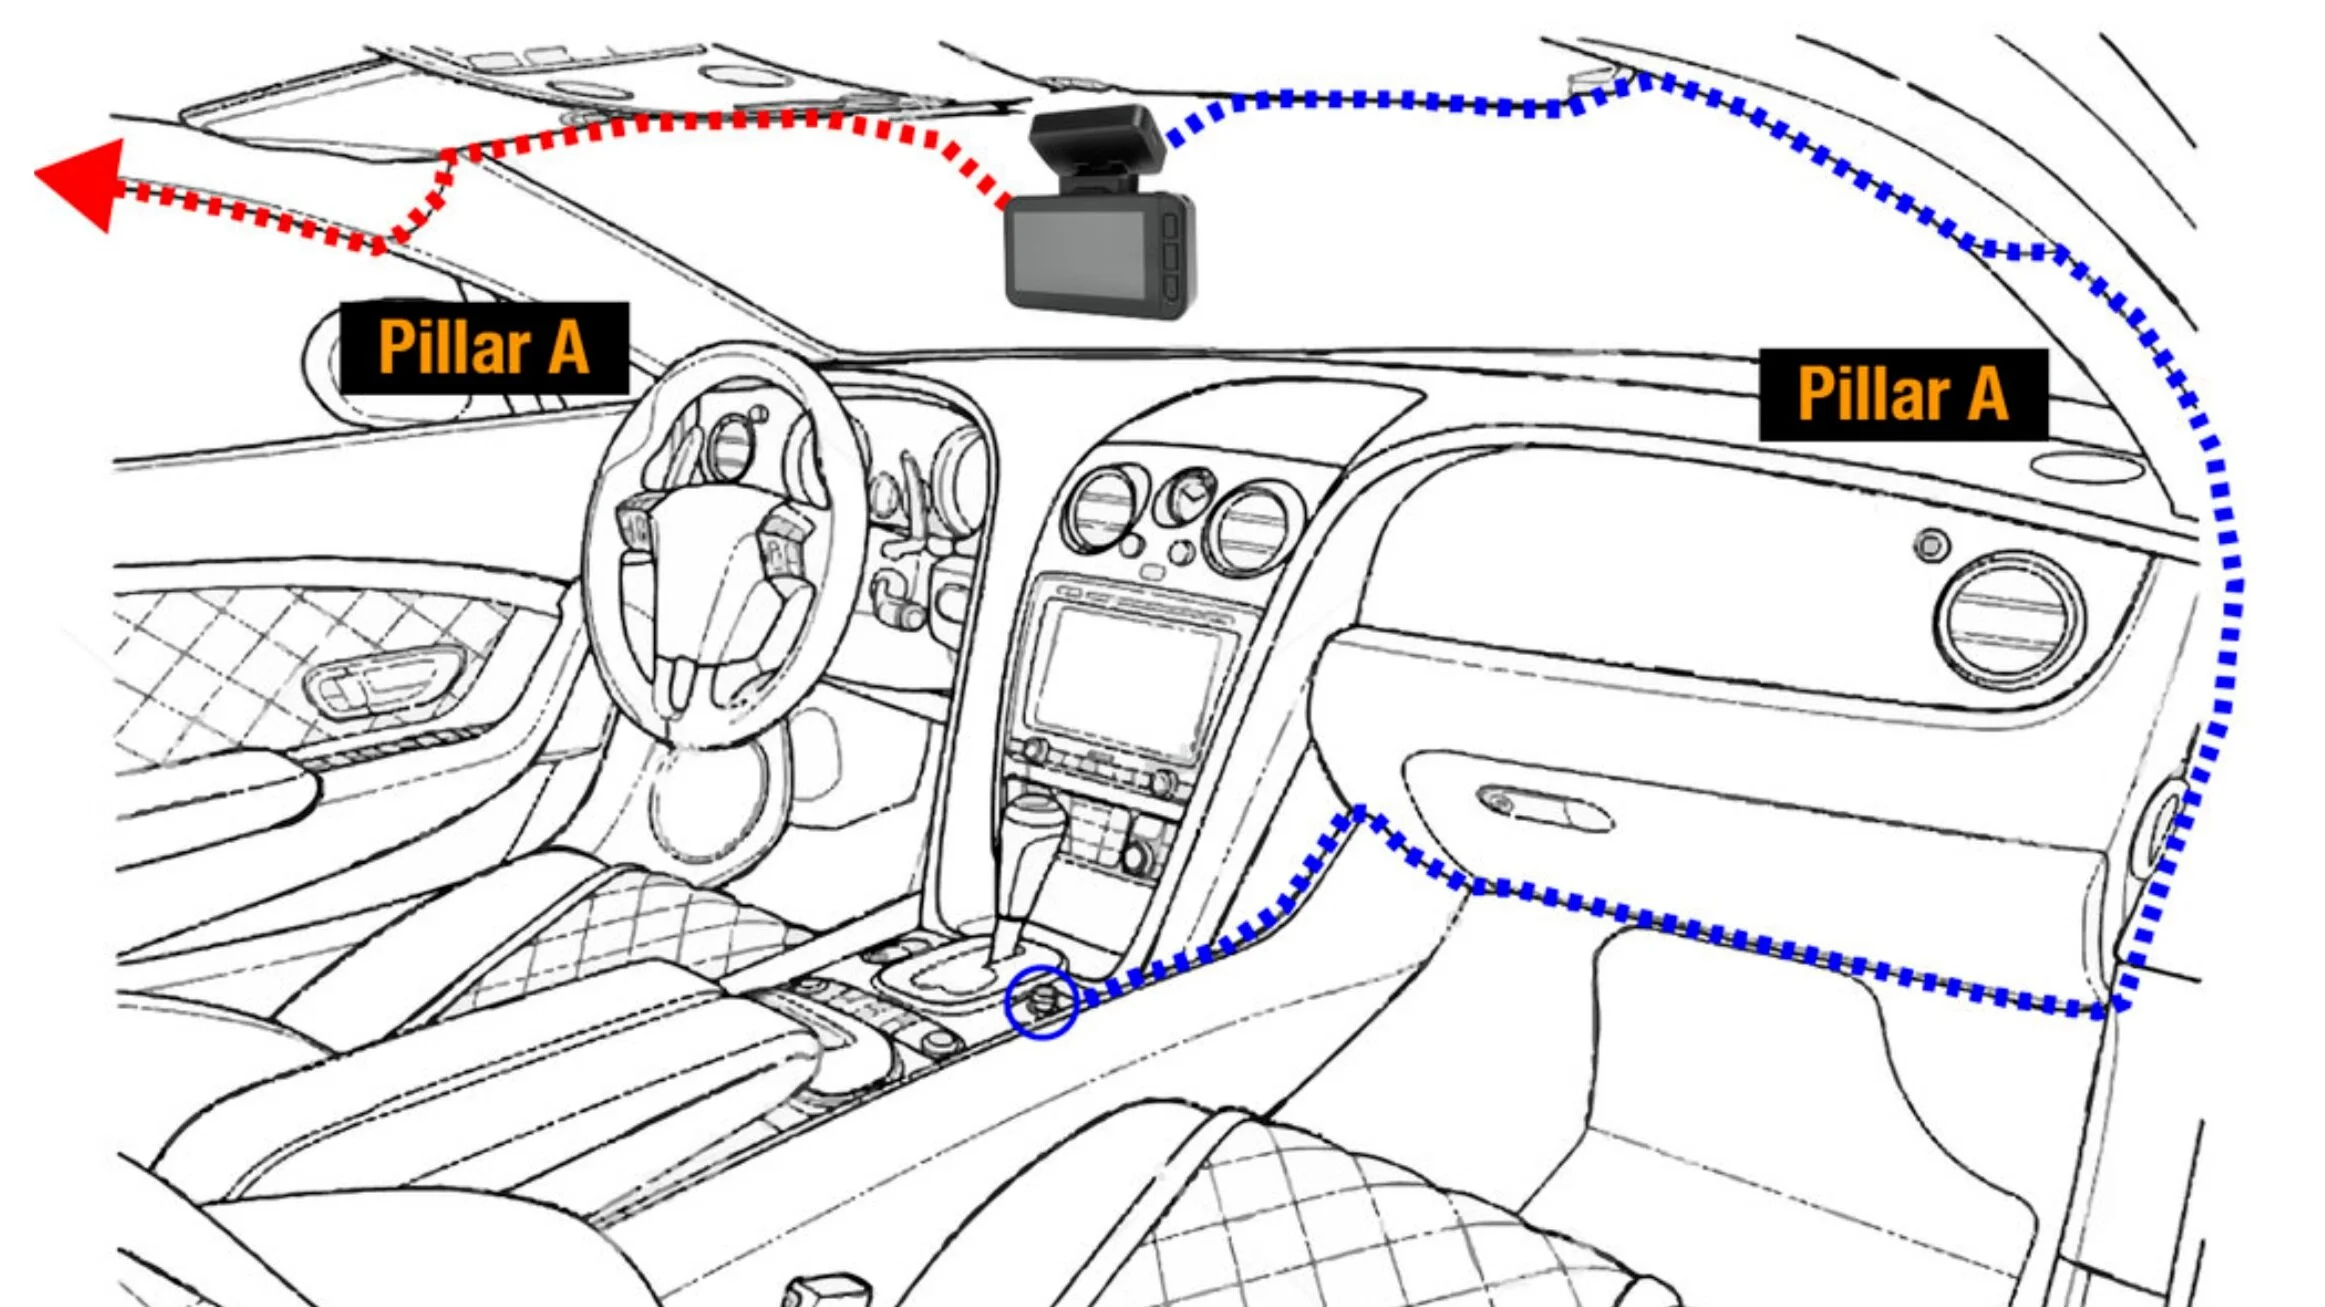
Running The Power Cable
Connect the cable to the dash camera. Tuck the cable into the headliner edge. Run it down the side of the windshield. Hide the wire under the dashboard trims. Keep the cable neat to avoid distractions.
Connecting To The Vehicle’s Power Source
Plug the power cable into the car’s 12V socket. Some dash cams support hardwiring to the fuse box. Use a fuse tap for a clean installation. Confirm the power source turns off with the ignition. Avoid draining the car battery.
Testing The Camera Setup
Start your car engine to power the camera. Check if the camera powers on automatically. Adjust the camera angle for a clear road view. Review the recorded video for quality. Confirm the GPS and date settings are correct.
Configuring Camera Settings
Configuring your dash camera settings is key to capturing clear videos and keeping your recordings organized. Proper setup helps you get the best footage and useful features.
Spend time adjusting each option to fit your driving needs. These settings control video clarity, recording style, and important functions like parking mode.
Adjusting Video Quality
Choose video resolution based on your needs and storage space. Higher quality means clearer images but uses more memory.
Select 1080p for sharp video or 720p to save space. Balance clarity with available storage on your memory card.
Setting Loop Recording
Loop recording lets the camera record over old files automatically. This keeps your storage from filling up.
Set loop intervals, such as 1, 3, or 5 minutes. Shorter loops create smaller files that are easier to manage.
Enabling Parking Mode
Parking mode records video even when the car is off. It activates if the camera detects movement or impact.
Turn on parking mode to protect your vehicle. Ensure your camera has power from a hardwire kit or a battery.
Date And Time Setup
Set the correct date and time for accurate video timestamps. This helps during insurance claims or police reports.
Use the menu to enter the current date and time. Double-check to keep your recordings reliable and useful.
Maintaining Your Dash Camera
Maintaining your dash camera ensures it works well for a long time. Regular care keeps the lens clear and the device ready to record. Simple steps help prevent issues and improve performance. Follow these tips to keep your dash camera in top shape.
Regular Cleaning Tips
Clean the lens gently with a soft cloth. Avoid harsh chemicals that can damage the lens. Wipe the screen and body carefully to remove dust and dirt. Check the mounting area to ensure the camera stays secure. A clean camera records clearer videos and captures better details.
Firmware Updates
Check for firmware updates often. Updates fix bugs and add new features. Visit the manufacturer’s website to download the latest software. Follow the instructions to install updates safely. Keeping firmware current improves camera stability and performance.
Troubleshooting Common Issues
Restart the camera if it freezes or stops working. Check the memory card for errors or replace it if needed. Ensure the power cable is connected properly. Reset the camera to factory settings to fix persistent problems. These steps solve most common dash camera issues quickly.
Maximizing Road Safety With Your Dash Camera
Dash cameras do more than just record your drives. They help keep you safer on the road. A dash camera provides clear proof during accidents. It encourages better driving habits. It also helps with legal matters. Using your dash camera right means you get the most safety benefits.
Using Video Evidence In Accidents
Dash camera videos show what really happened during a crash. This helps prove who is at fault. Clear footage can speed up insurance claims. It reduces arguments between drivers. Police officers use videos to understand the accident better. Videos make it easier to solve disputes fairly.
Sharing Footage With Authorities
Sharing dash cam footage with police helps investigations. It provides important details that might be missed. Videos can catch reckless drivers or hit-and-runs. Authorities rely on video proof for stronger cases. You can send footage online or bring it in person. This support helps keep roads safer for everyone.
Improving Driving Habits
Watching your own driving videos shows your mistakes. You can see risky moves or distractions. This helps you drive more carefully next time. Drivers become more aware and alert on the road. Over time, better habits reduce chances of accidents. A dash camera is a tool to learn safer driving.
Credit: www.grdian.com
Frequently Asked Questions
How Do I Install A Dash Camera In My Car?
To install a dash camera, first clean your windshield. Mount the camera near the rearview mirror. Route the power cable to the car’s fuse box or cigarette lighter. Secure the cables neatly to avoid obstruction. Finally, test the camera to ensure it powers on.
What Tools Are Needed To Install A Dash Cam?
You typically need a dash cam, power cable, adhesive mount, and a fuse tap. A trim removal tool helps hide wires. Some installations may require a screwdriver or pliers. Always check your dash cam’s manual for specific tools needed.
Can I Install A Dash Camera Myself?
Yes, most dash cameras are designed for DIY installation. The process is simple and involves mounting the camera and connecting power. Follow the user manual step-by-step. If unsure, professional installation is always an option for safety.
Where Is The Best Place To Mount A Dash Camera?
The best spot is behind or near the rearview mirror. This location ensures a clear view without obstructing the driver’s vision. It also protects the camera from theft and gives a wide field of view for recording.
Conclusion
Installing a dash camera helps protect you on the road. It records important events while you drive. Follow the steps carefully for a safe setup. Place the camera where it sees the road clearly. Connect the power and test the camera before driving.
A good dash camera gives peace of mind every trip. Keep the lens clean and check the memory card often. Now, you are ready to drive with extra safety and confidence.
As an Amazon Associate, I earn from qualifying purchases.
