

Have you ever needed to quickly scan a document but didn’t have a scanner nearby? Your iPhone’s camera can do the job perfectly, turning any paper into a clear, digital copy in seconds.
Imagine saving time and avoiding extra gadgets by simply using a tool you already carry every day. In this guide, you’ll learn exactly how to scan a document on your iPhone with just its camera—no complicated apps or tech skills required.
Keep reading, and you’ll discover simple steps that make scanning fast, easy, and reliable every time.
Prepare Your Iphone Camera
Make sure your iPhone camera lens is clean and free of smudges for clear scans. Good lighting helps capture sharp document images quickly. Hold the phone steady to avoid blurry results.
Before scanning a document, your iPhone camera needs some preparation. A clear and sharp image helps create a good scan. Small steps can improve the scan quality. Taking time to prepare your camera saves effort later.
Focus on two main things: camera settings and lens cleanliness. These affect how well your document appears in the scan. Let’s explore these steps for better scanning results.
Check Camera Settings
Open the Camera app on your iPhone. Ensure it is set to Photo mode. Avoid using filters or special effects. Turn off the flash to prevent glare on the document. Adjust the focus by tapping on the document area on the screen. This makes the text sharp and clear. Use the exposure slider to brighten or darken the image if needed. Correct settings help capture every detail of the document.
Clean The Lens
A dirty lens can blur your scan. Use a soft, clean cloth to wipe the lens gently. Avoid using harsh chemicals or rough materials. Clean the lens regularly, especially before scanning. This removes dust, fingerprints, or smudges. A clean lens ensures crisp and clear images every time.
Credit: hcsonline.com
Choose The Best Lighting
Choosing the best lighting is very important for scanning documents with your iPhone camera. Good lighting makes the text clear and easy to read. It also prevents blurry or dark images. Bright and even light gives the best results for your scans.
Use Natural Light
Natural light is the easiest and best light source. Try to scan near a window during the day. Sunlight makes the document bright and sharp. Avoid direct sunlight that can cause bright spots. Indirect natural light works perfectly for clear scans.
Avoid Shadows And Glare
Shadows can hide parts of your document. Move your phone or the paper to stop shadows from falling on the page. Glare from lights or the sun can create shiny spots. Tilt the paper or change your angle to reduce glare. Clear, even lighting helps capture every word well.
Position The Document
Positioning the document correctly is key to a clear scan. This step helps your iPhone camera capture all details sharply. Avoid shadows and blurs by placing the document carefully.
Proper placement makes scanning faster and saves time on edits. Take a moment to arrange the paper well before opening the camera app.
Flat Surface Placement
Place your document on a flat surface like a table or desk. A smooth, even area prevents wrinkles and shadows on the paper. This setup lets the camera focus better on the text and images.
A flat surface also keeps the document steady. Avoid holding the paper in your hand while scanning. Movement can cause blurry pictures and reduce scan quality.
Aligning The Document
Align the edges of your document with the surface edges. Straight edges help the iPhone camera detect the document corners quickly. This alignment ensures the whole document fits inside the frame.
Keep the document centered in the camera view. Leave some space around the edges to avoid cutting off text. Proper alignment leads to a neat and professional scan.
Capture The Document
Capturing a document with your iPhone camera is simple and quick. This step is key to getting a clear, readable scan. Follow these easy actions to capture your document correctly.
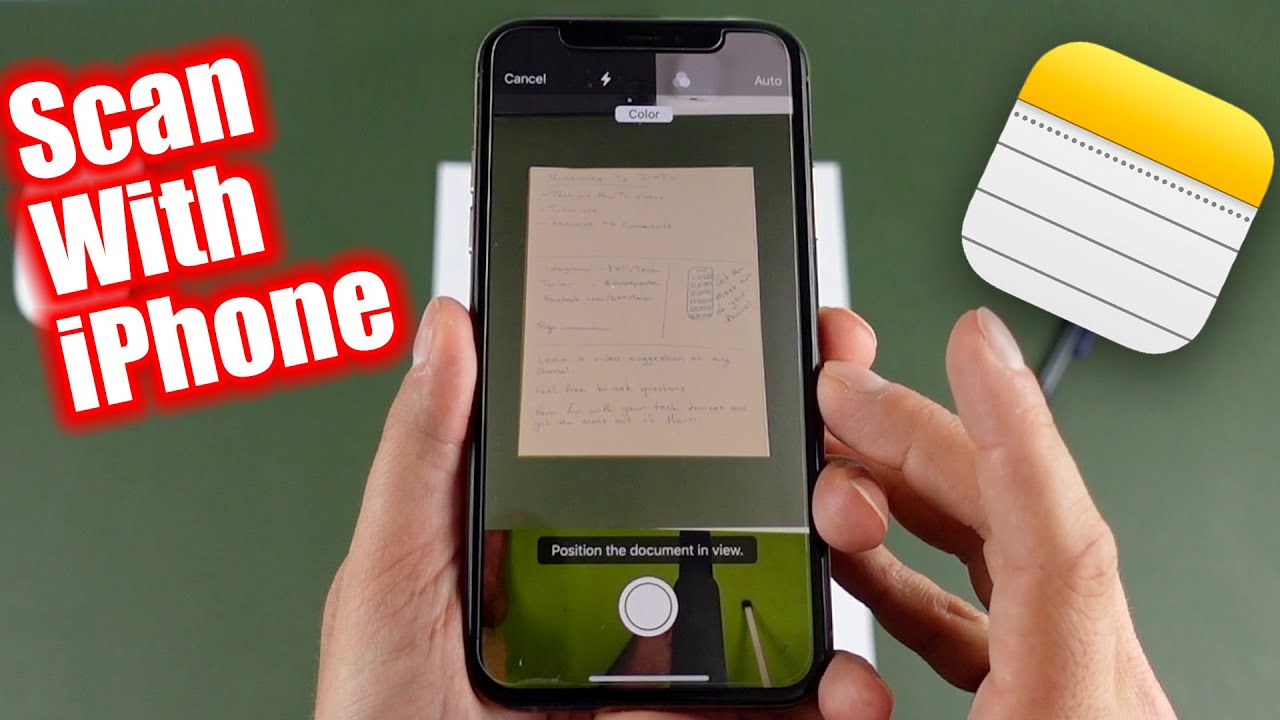
Open Camera App
Start by unlocking your iPhone. Find and tap the Camera app icon. The app opens instantly, ready to snap a photo. Ensure you are in Photo mode for the best results.
Focus And Adjust
Hold your phone steady above the document. Move the phone closer or farther to fit the whole page in the frame. Tap the screen where the document appears to focus. This sharpens the image and improves clarity.
Take The Photo
Press the white shutter button to capture the image. Keep your hand steady until the photo is taken. Review the picture to check if it is clear and readable. Retake it if needed.
Edit The Scanned Image
After scanning a document with your iPhone camera, editing the image improves its clarity. Editing helps make the document easier to read and looks more professional. The iPhone offers simple tools to crop, rotate, and adjust brightness and contrast. These options enhance the scanned image quickly and easily.
Crop And Rotate
Cropping removes unwanted edges from the scanned image. It focuses on the main content of the document. You can pinch to zoom and drag the corners to crop the image perfectly. Rotating helps fix the image if it is tilted or upside down. Tap the rotate button until the document is correctly aligned. These changes make the document neat and easy to view.
Adjust Brightness And Contrast
Adjusting brightness makes the document lighter or darker. This helps improve text visibility. Increasing contrast makes the text stand out more from the background. You can slide the brightness and contrast controls until the document looks clear. This step is important to make the scanned document easy to read on any screen.

Credit: www.youtube.com
Save And Share The Scan
After scanning a document with your iPhone camera, saving and sharing the scan is simple. This step helps keep your files organized and ready to send. You can save scans directly to your Photos app or share them through email and other apps. Both options make it easy to access and distribute your scanned documents.
Save To Photos
To save your scan to Photos, open the scanned document preview. Tap the share icon at the bottom of the screen. Select “Save Image” from the options. Your scan will appear in the Photos app under the “Recents” album. This method keeps your scans handy for quick viewing anytime.
Share Via Email Or Apps
Sharing scans via email or other apps is quick. Open the scan and tap the share icon. Choose the app you want to use, like Mail, Messages, or WhatsApp. Add the recipient’s contact information and send the scan. This option makes sharing documents fast and easy.
Use Built-in Scan Feature
Using the built-in scan feature on your iPhone makes document scanning simple and fast. No need for extra apps. Your iPhone’s camera and software work together to capture clear, sharp scans. This feature is perfect for saving receipts, forms, or notes digitally.
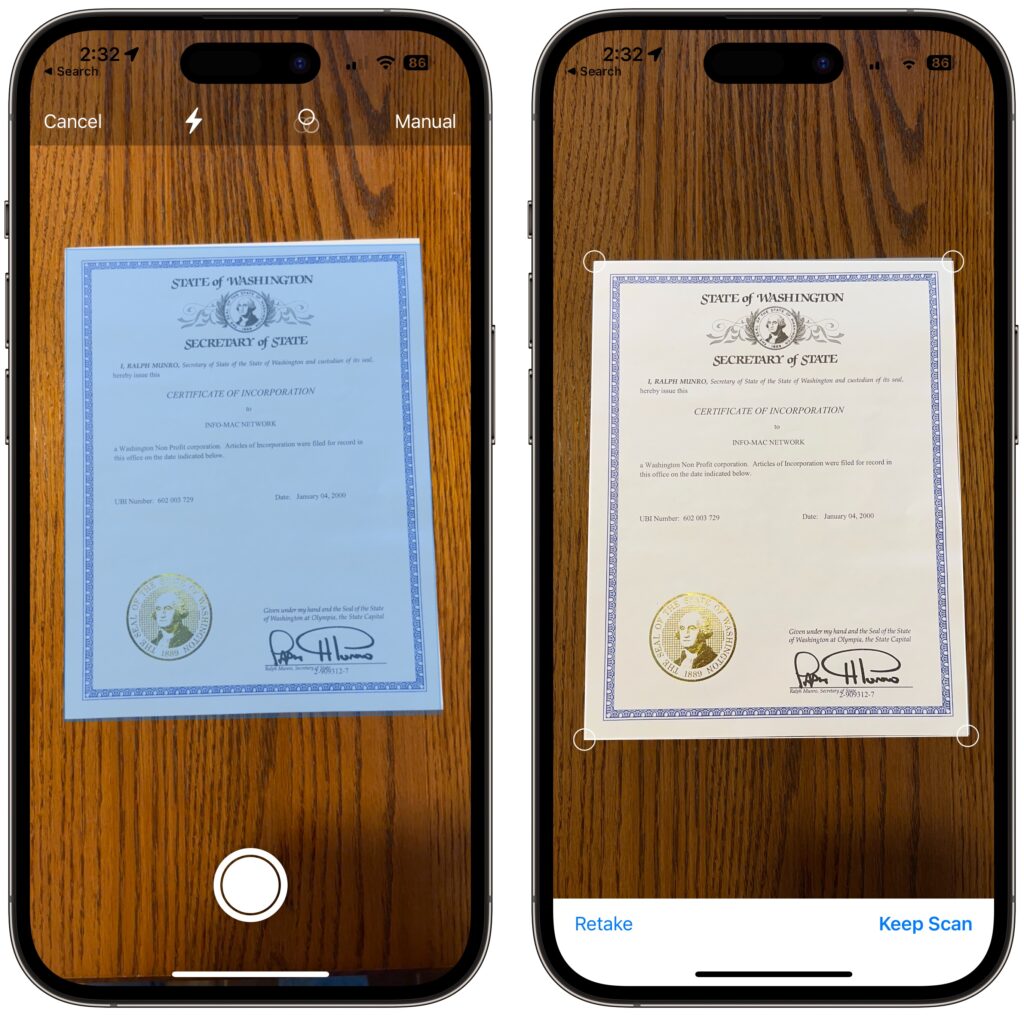
Scan With Notes App
Open the Notes app on your iPhone. Tap the create new note button. Tap the camera icon and select “Scan Documents.” Hold your iPhone over the document. The app will focus and capture the scan automatically. You can adjust the corners if needed. Save the scan inside your note for easy access later.
Automatic Edge Detection
The built-in scan feature finds document edges by itself. It detects the paper shape even on uneven surfaces. This means your scan looks neat and cropped. The iPhone also fixes lighting and contrast. The result is a clear, readable document without extra effort.
Credit: www.youtube.com
Tips For Better Scans
Getting a clear and sharp scan on your iPhone is easier with a few simple tips. These tips help you capture documents that look professional and are easy to read. Follow these methods to improve every scan you take with your camera.
Steady Hands
Hold your iPhone steady to avoid blurry images. Use both hands or rest your phone on a surface. Keep your hands still until the camera finishes focusing. A steady phone means a clear, sharp scan every time.
Multiple Shots
Take several photos of the same document from different angles. This gives you options to choose the best scan. Check each photo for clarity and brightness. Multiple shots help you avoid mistakes and get the perfect image.
Use A Scanning App
Try using a scanning app for better results. These apps adjust lighting and crop edges automatically. Many apps also convert images to PDF files. Scanning apps make your documents look clean and professional without extra effort.
Frequently Asked Questions
How Do I Scan A Document Using Iphone Camera?
Open the Notes app and create a new note. Tap the camera icon and select “Scan Documents. ” Position your document in view. The iPhone camera will automatically capture the scan. Adjust corners if needed, then save your scanned document.
Can I Scan Multiple Pages In One Iphone Scan?
Yes, after scanning the first page, tap “Add” to scan more pages. Repeat until all pages are scanned. Tap “Save” to create a multi-page PDF document. This feature helps combine multiple pages into one file easily.
What File Format Does Iphone Save Scanned Documents?
IPhone saves scanned documents as PDFs by default. This format is widely compatible with most devices and apps. You can share, edit, or export the PDF directly from the Notes app or Files app.
Is Special Software Needed To Scan Documents On Iphone?
No special software is needed. The built-in Notes app includes a document scanning feature. This allows quick and easy scanning without third-party apps. It’s free and efficient for basic scanning needs.
Conclusion
Scanning documents with your iPhone camera is quick and easy. Just follow the steps carefully to get clear scans. No need for extra apps or tools. Save your files directly to your phone or cloud. This method helps keep your important papers organized.
Practice a few times to feel confident. Soon, scanning will become a simple part of your daily routine. Try it today and see how useful it can be.
As an Amazon Associate, I earn from qualifying purchases.
