Looking for a unique way to protect your phone while showing off your style? You’re in the right place.
Making your own phone case is easier than you think, and it lets you create something that’s truly yours. Imagine holding a case designed by you, with colors and patterns that match your personality perfectly. In this guide, you’ll discover simple steps to craft a phone case that stands out and keeps your device safe.
Ready to turn your phone into a one-of-a-kind accessory? Let’s dive in!
Materials Needed
Making a phone case is a fun and creative project. Having the right materials helps a lot. Gather all items before you start. It saves time and makes the process smooth.
Basic Supplies
You need a few basic supplies to make a phone case. First, get a plain phone case that fits your phone model. Clear or solid color cases work best. Next, choose strong glue or adhesive tape to hold decorations. Scissors are helpful for cutting materials to size. A ruler or measuring tape ensures precise cuts. If you want to paint, buy acrylic paints and brushes. Protective gloves keep your hands clean. Lastly, use a clean cloth to wipe your case before decorating.
Optional Decorative Items
Decorations make your phone case unique. Stickers and decals add color and fun shapes. Small gems or rhinestones create sparkle. Fabric pieces or felt give texture. Washi tape offers patterns and easy application. You can also use markers or pens for drawing. Use stencils for neat designs. Glitter adds shine but use it sparingly. Choose items that fit your style and phone case size.
Choosing A Phone Case Base
Choosing the right base for your phone case is important. It sets the foundation for your design and protects your device. The base must fit well and feel good in your hand. It should match your style and offer enough protection. Picking a strong, durable base helps your case last longer. Consider the material and size before starting your project.
Types Of Case Materials
Phone cases come in many materials. Plastic is light and cheap. It can be hard or soft. Silicone is soft and flexible. It absorbs shocks well. Leather looks classy and feels smooth. It offers moderate protection. Metal cases are very strong but can be heavy. Wood cases are unique and natural. They may scratch more easily. Choose a material that fits your lifestyle and needs.
Sizing Tips
Fit matters a lot for phone cases. A loose case can fall off easily. A tight case might damage the phone. Check your phone model before buying a base. Measure length, width, and thickness. Look at the camera and button openings. Make sure the case covers all edges. Test the case on your phone if possible. Proper size keeps your phone safe and comfortable to hold.
Design Ideas
Design ideas are the heart of creating a unique phone case. They help express your style and personality. Simple designs can look elegant. Bright colors can catch the eye. You can choose from many ways to decorate your case.
Simple Patterns
Simple patterns are easy and stylish. Stripes, dots, or small shapes work well. Use paint, markers, or tape to make neat lines. These patterns suit any phone and look clean. They are perfect for a quick design that stands out.
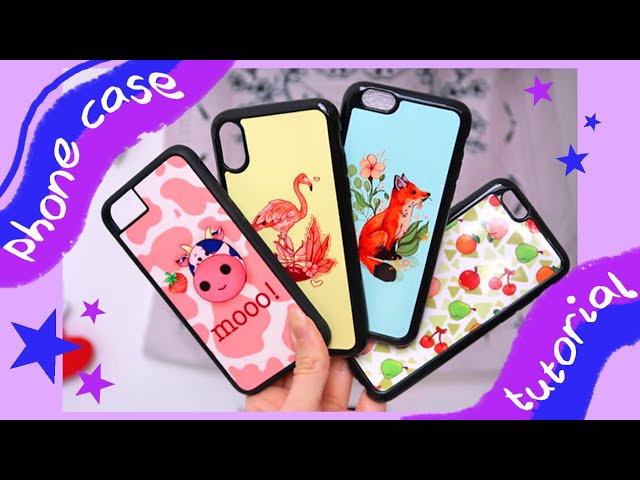
Photo And Artwork Integration
Photos and artwork add a personal touch. Print a favorite photo or draw your own art. Attach the image inside a clear case or glue it on. This method protects your picture and keeps it visible. It makes the case feel special and one of a kind.
Using Stickers And Decals
Stickers and decals are simple to use and remove. Choose from many themes like nature, cartoons, or quotes. Arrange them creatively on your case for a fun look. They allow you to change your design anytime. This is a great way to keep your case fresh.
Preparing Your Workspace
Preparing your workspace is the first step to making a phone case. A clean and organized area helps you work better and faster. It keeps tools within reach and protects your materials. This part focuses on setting up tools and protecting surfaces.
Setting Up Tools
Gather all the tools you need before starting. Common tools include scissors, glue, paintbrushes, and rulers. Place them in a small container or tray to keep them organized. Keep frequently used tools close for easy access. Check that all tools are clean and in good shape.
Protecting Surfaces
Cover your workspace with newspaper or a plastic sheet. This prevents glue, paint, or scratches from damaging your table. Use a cutting mat if you need to cut materials. It protects the surface and helps make straight cuts. Clean the area after each step to avoid mess build-up.
Step-by-step Case Decoration
Decorating your phone case can make it truly personal. This step-by-step guide shows how to do it clearly. Each step helps you create a unique look. Follow these simple instructions to make your phone case stand out.
Cleaning The Case
Start by cleaning the phone case well. Use a soft cloth with mild soap and water. Remove all dust and dirt. This helps paint and glue stick better. Let the case dry completely before moving on.
Applying Base Layers
Apply a base layer of paint or color. Use light, even strokes for smooth coverage. Choose a color that fits your design idea. Let the base dry fully to avoid smudges. This layer makes your decoration bright and clear.
Adding Details
Add small details with fine brushes or markers. Draw patterns, shapes, or words you like. Be patient and careful for neat results. Use stickers or small decorations for extra style. Details make your case special and fun.
Sealing The Design
Seal your design with a clear coat or varnish. This protects your work from scratches and water. Apply thin, even layers and let each dry well. A sealed case lasts longer and keeps its shine. Your phone case is ready to use.
Credit: www.youtube.com
Drying And Curing Time
Drying and curing time is a key step in making a phone case. It helps the materials harden and become strong. Without proper drying, the case may stay soft or sticky.
Patience is important during this process. Rushing can cause damage or reduce the case’s quality. Each material has its own drying and curing needs.
Understanding Drying Time
Drying time is how long the phone case needs to air dry. This lets moisture or solvents evaporate from the surface. Usually, drying takes a few hours.
Keep the phone case in a dust-free place. Avoid touching it during this time. A clean and dry environment speeds up drying.
What Is Curing Time?
Curing time is the time needed for the material to fully harden. It can take from a few hours to several days. Curing makes the case strong and durable.
Some materials cure faster under heat or sunlight. Follow the instructions for best results. Do not use the case before it cures fully.
Tips To Speed Up Drying And Curing
Place the case in a warm, dry spot. Avoid direct sunlight to prevent warping or fading. Use a fan to improve air flow.
Keep the case away from dust and dirt. Do not move or bend it until it is ready. Patience ensures a long-lasting phone case.
Care And Maintenance Tips
Taking care of your phone case keeps it looking fresh and protects your phone better. Small steps help your case last longer. Clean it often and avoid harsh conditions. Follow easy tips to keep your phone case safe and neat.
Cleaning Your Phone Case
Use a soft cloth and mild soap to clean your phone case. Gently wipe the surface to remove dirt and oils. Avoid using strong chemicals that can damage the material. Let it dry completely before putting it back on your phone.
Avoiding Heat And Sunlight
Keep your phone case away from direct sunlight and heat. Heat can cause colors to fade and the material to weaken. Store your phone in a cool, shaded place when not in use. This helps maintain the case’s shape and color.
Preventing Scratches And Damage
Do not place your phone on rough surfaces without the case. Avoid sharp objects that can scratch the case’s surface. Handle your phone gently to prevent cracks and dents. Use a soft pouch if you carry your phone in a bag.

Credit: www.wikihow.com
Troubleshooting Common Issues
Making your own phone case can be fun but sometimes problems happen. These problems can spoil your design or make the case look bad. Fixing these issues helps your phone case look great and last longer.
Peeling Or Fading Designs
Peeling happens when the design lifts from the case surface. This usually comes from poor glue or wet conditions. Use strong glue made for plastics and let it dry fully. Avoid touching the design until it is dry. Fading happens when colors lose brightness over time. Keep your case out of direct sunlight to stop fading. Use sealed coatings to protect the colors and keep them fresh.
Bubbles And Wrinkles
Bubbles and wrinkles form under the design or clear layer. These appear if you apply the design too fast or trap air inside. Press slowly and start from one side to push air out. Use a flat tool like a credit card to smooth the surface. If bubbles stay, lift the corner gently and press again. Wrinkles often happen if the material is too dry or too wet. Keep the case at room temperature and avoid moisture during the process.
Creative Variations
Creative variations make your phone case unique and personal. They let you express style and protect your device. You can try different materials and techniques to create something special. These ideas add fun and beauty to a simple case.
Using Resin
Resin creates a shiny, smooth surface on your phone case. You can mix colors or add small items like glitter or flowers. Pour the resin carefully and let it dry fully. This method makes your case strong and eye-catching.
Resin also protects decorations inside the case. It keeps them safe from scratches and water. This technique allows many creative designs with clear or colored resin. The final look feels sleek and professional.
Incorporating Fabric Or Textures
Fabric adds softness and interesting textures to your phone case. Use pieces of cloth, lace, or felt. Glue them carefully onto the case surface. This change makes the case feel nice and look different.
Textures like leather, burlap, or suede also work well. They give a rich, natural look. You can combine textures with paint or stamps for more effect. Textured cases stand out and feel comfortable in your hand.

Credit: muumade.com
Frequently Asked Questions
What Materials Are Best For Making A Phone Case?
The best materials include silicone, TPU, leather, and plastic. Each offers durability, flexibility, and protection. Choose based on style and protection needs.
How Do I Customize A Phone Case Design?
Use paints, stickers, or decals for personalization. Digital printing or engraving are also popular methods. Customize to reflect your style.
Can I Make A Phone Case Without Special Tools?
Yes, basic tools like scissors, glue, and paint work well. Many DIY phone cases require minimal equipment. This makes it easy and affordable.
How Long Does It Take To Make A Phone Case?
Making a phone case usually takes 30 minutes to an hour. Drying time for paints or glue may extend this. Time varies by method and materials.
Conclusion
Making your own phone case is fun and creative. You choose the colors, designs, and materials. It saves money and gives a personal touch to your phone. You can protect your phone while showing your style. Try different ideas and enjoy the process.
Keep practicing to improve your skills. Everyone can make a phone case with simple steps. Start today and create something unique just for you.
As an Amazon Associate, I earn from qualifying purchases.