Have you ever wished your phone case was as unique as you are? Making your own phone case lets you do just that—create a design that fits your style perfectly.
It’s easier than you might think, and you don’t need fancy tools or expensive materials. You’ll discover simple steps to craft a phone case that stands out and protects your device. Ready to turn your phone into a personal statement?
Keep reading, and let’s get started!
Credit: fundacioninbursa.org
Materials Needed
Making your own phone case is a fun and creative project. Gathering the right materials helps make the process smooth and enjoyable. You need a few basic supplies to start. Some extra decorative items can make your case unique.
Basic Supplies
Start with a clear or plain phone case that fits your phone model. Use strong glue that dries clear to attach decorations. Scissors help cut materials to the right size. Paper towels or cloth protect your workspace. A pencil or marker can outline designs before you apply them.
Optional Decorative Items
Choose items that match your style. Stickers, washi tape, and rhinestones add color and shine. Small photos or printed images personalize the case. Fabric pieces or felt create texture. Paint pens or permanent markers let you draw patterns. These extras make your phone case stand out.

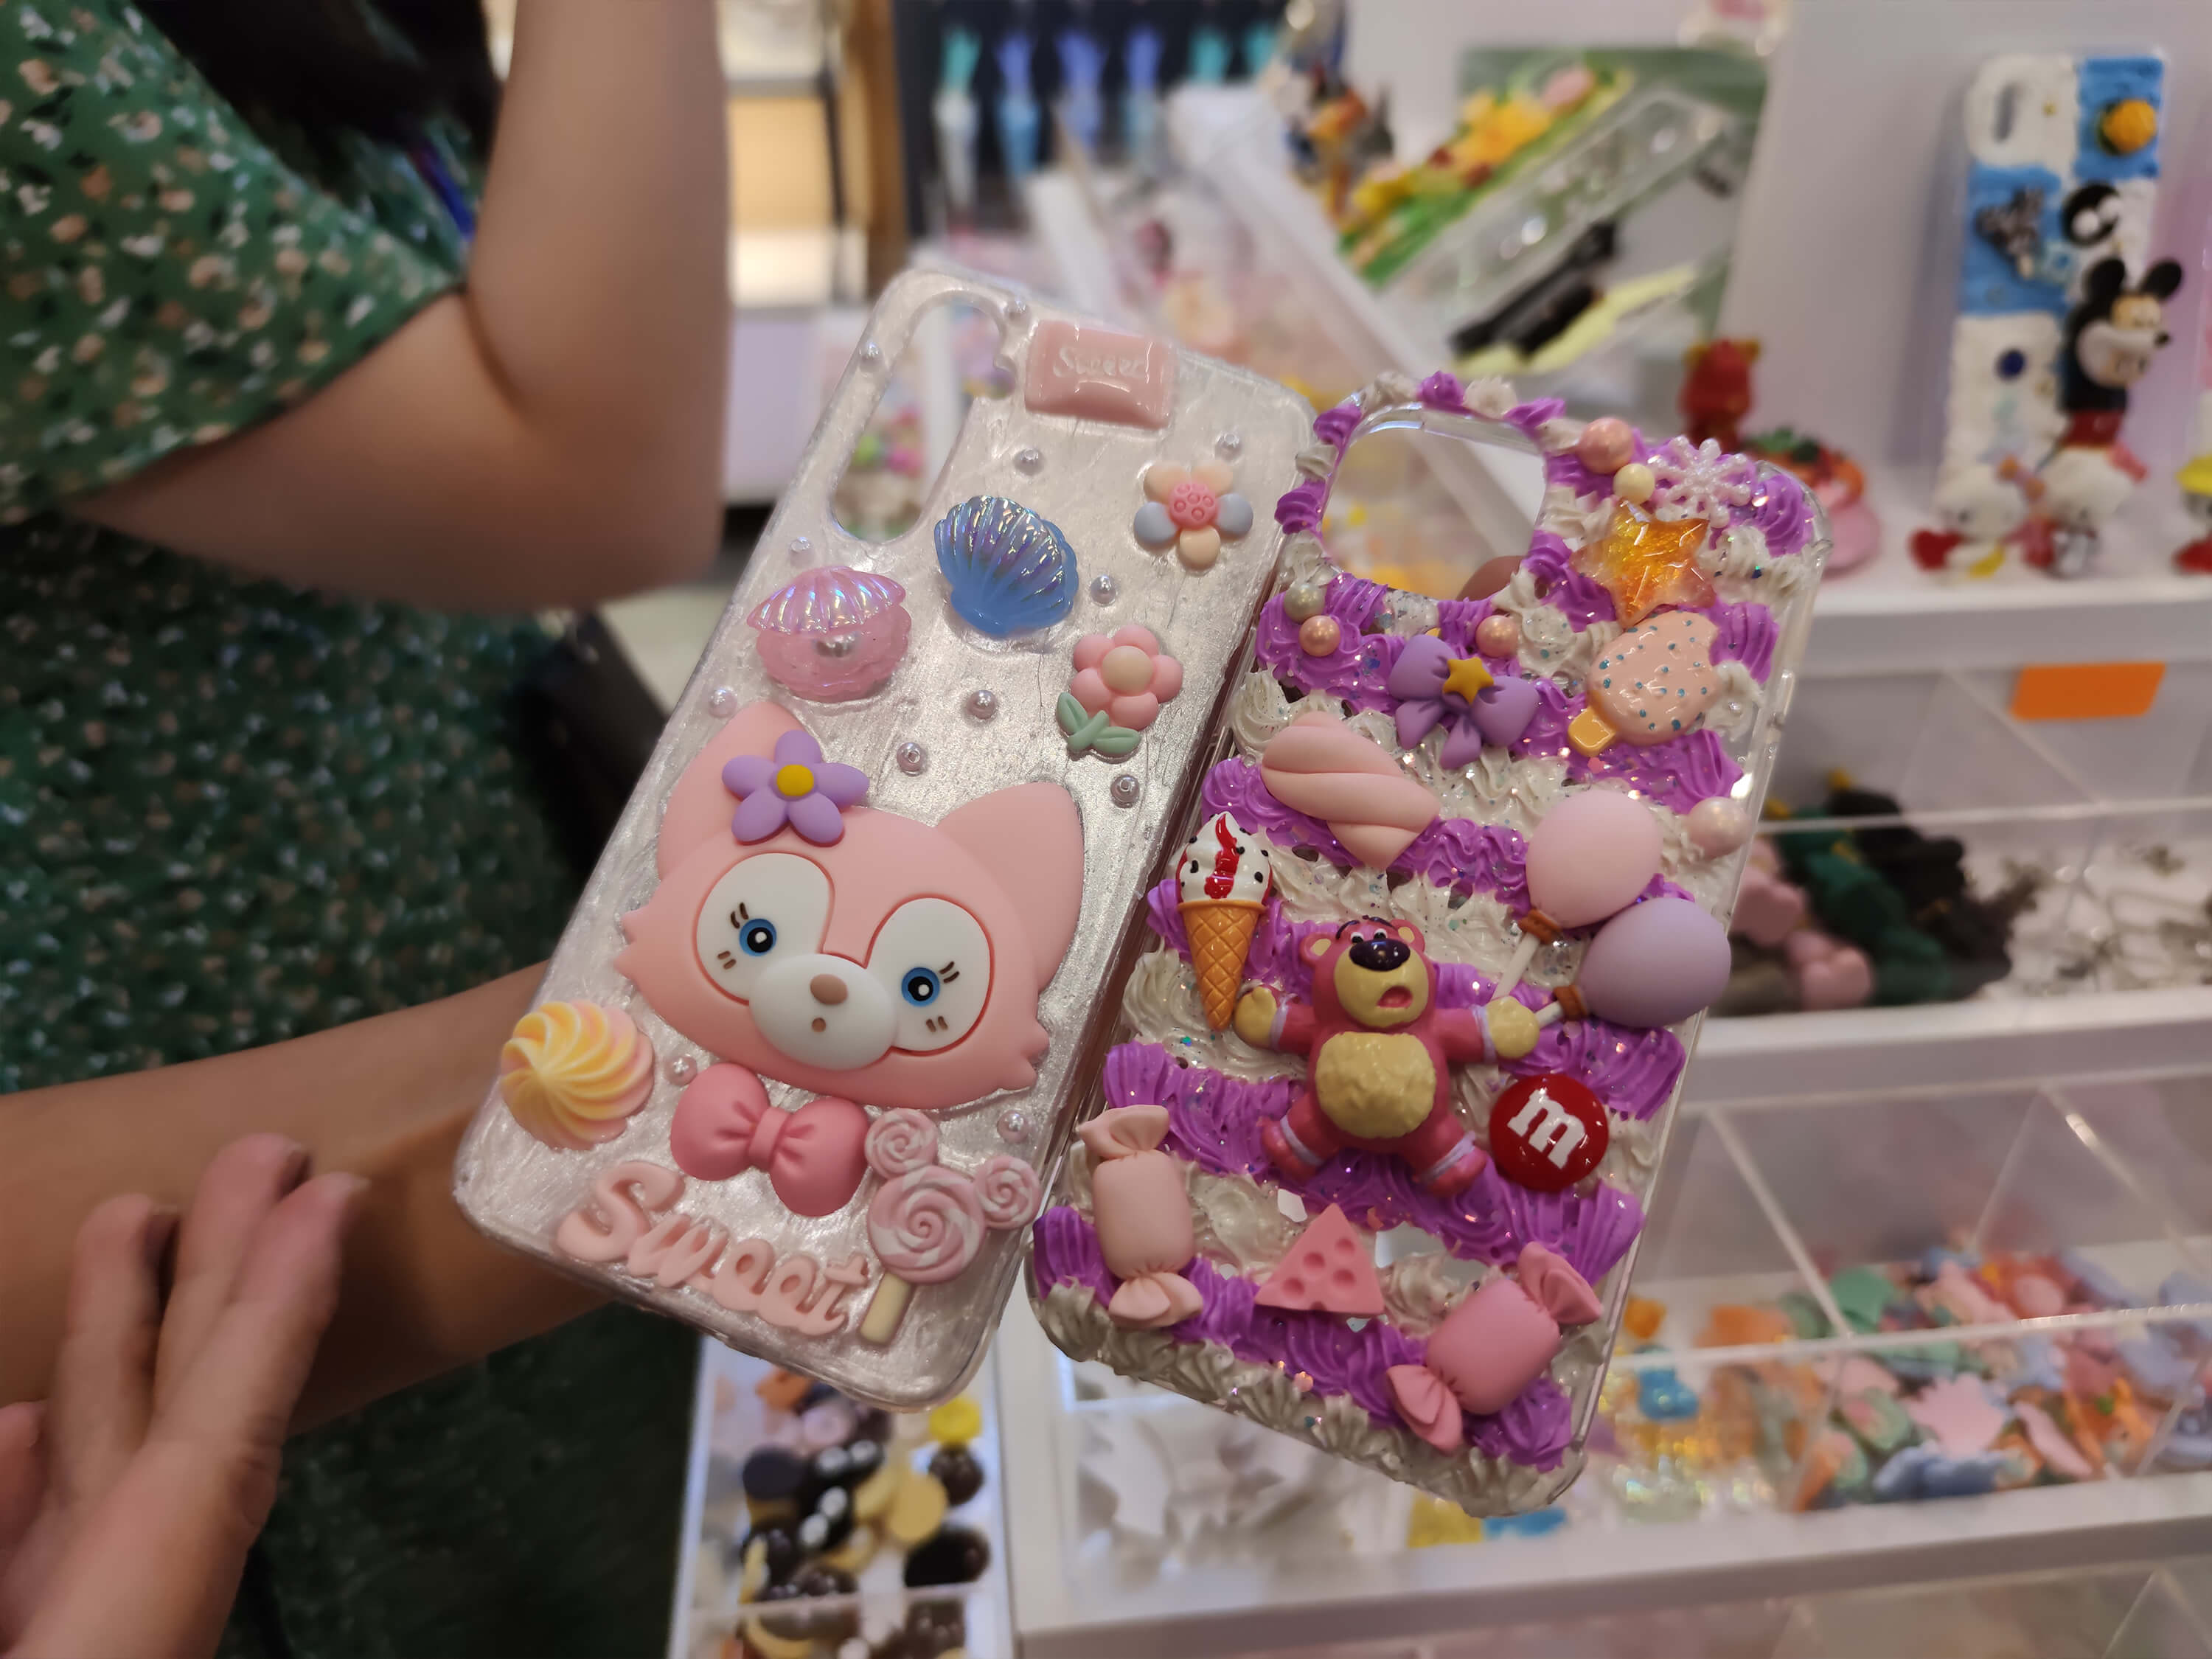
Credit: www.youtube.com
Choosing The Right Phone Case Base
Choosing the right phone case base is the first step in creating a custom case. The base affects the look, feel, and protection of your phone. Pick a base that fits your needs and style. Consider durability, texture, and design options before buying. A good base makes decorating easier and more fun.
Types Of Blank Cases
There are many types of blank phone cases to choose from. Silicone cases are soft and flexible. They absorb shocks well. Hard plastic cases offer a sturdy shell that resists scratches. TPU cases combine softness and strength. Some cases have a matte finish, others are glossy. Choose a type that matches your decoration plan and daily use.
Sizing Tips
Getting the right size is crucial for a perfect fit. Check your phone model carefully before buying. Many cases list compatible models on the package. Avoid cases that are too loose or too tight. A snug fit protects your phone better. Measure your phone if unsure. Keep in mind extra space for buttons and ports.
Simple Painting Techniques
Painting your own phone case is a fun and creative project. Simple painting techniques can turn a plain case into a unique accessory. You do not need many tools or skills to start. Just a few basic steps and some paint can make a big difference.
These techniques work well for beginners. They allow you to add color and style quickly. Painting also lets you express your personality through your phone case. Let’s explore some easy ways to paint your phone case.
Using Acrylic Paints
Acrylic paints are perfect for phone cases. They dry fast and stick well to plastic or silicone. Choose bright colors or pastels for a fresh look. Use small brushes to paint fine details. You can also use a sponge for soft textures.
Start with a clean, dry case. Apply one or two coats of paint. Let each coat dry completely before adding the next. Seal your design with a clear varnish to protect it. This step helps the paint last longer and prevents scratches.
Creating Patterns And Designs
Patterns make phone cases look interesting and stylish. Stripes, dots, and shapes are easy to paint. Use painter’s tape to create clean lines for stripes. Stencils can help you paint perfect shapes and letters.
Try mixing colors for a gradient effect. Paint small dots in rows for a polka dot pattern. Let your imagination guide you to simple designs. Keep the patterns balanced and not too crowded for the best look.
Adding Textures And Embellishments
Adding textures and embellishments can turn a plain phone case into a unique piece. These small touches give your case personality and style. They also make your phone easier to spot. Choose materials that feel good in your hand and look nice. Experiment with different ideas to find what suits you best.
Glitter And Rhinestones
Glitter adds sparkle and shine to any case. Use glue to stick glitter in patterns or cover the whole case. Rhinestones bring a 3D effect and a touch of glam. Place them carefully with tweezers. Arrange rhinestones in shapes or random clusters. Let the glue dry fully for a long-lasting hold.
Fabric And Stickers
Fabric pieces add softness and interesting texture. Cut fabric to fit your case and glue it flat. Choose colorful or patterned fabrics for a fresh look. Stickers are easy to apply and remove. Mix and match different stickers for a fun design. Seal your work with a clear coat for protection.
Using Decoupage For Custom Designs
Using decoupage is a simple way to create unique phone cases. It lets you add your favorite pictures or patterns. You can easily customize your case with personal style. This method uses glue and paper to make a smooth design. It works well on many types of phone cases. Follow the steps below to make your own decoupage phone case.
Selecting Paper And Images
Choose paper that is thin and flexible. This helps it stick well to the case. Print images on regular or photo paper. You can also use magazine cutouts or decorative napkins. Pick pictures that fit your phone case size. Small details work best for a neat look. Avoid thick or shiny paper, as it may peel off.
Sealing Your Design
After gluing your images, let them dry completely. Apply a clear sealer or decoupage glue on top. Use a soft brush and smooth strokes. This step protects your design and adds shine. Apply two or three thin layers for best results. Allow each layer to dry before adding the next. A sealed design lasts longer and resists scratches.
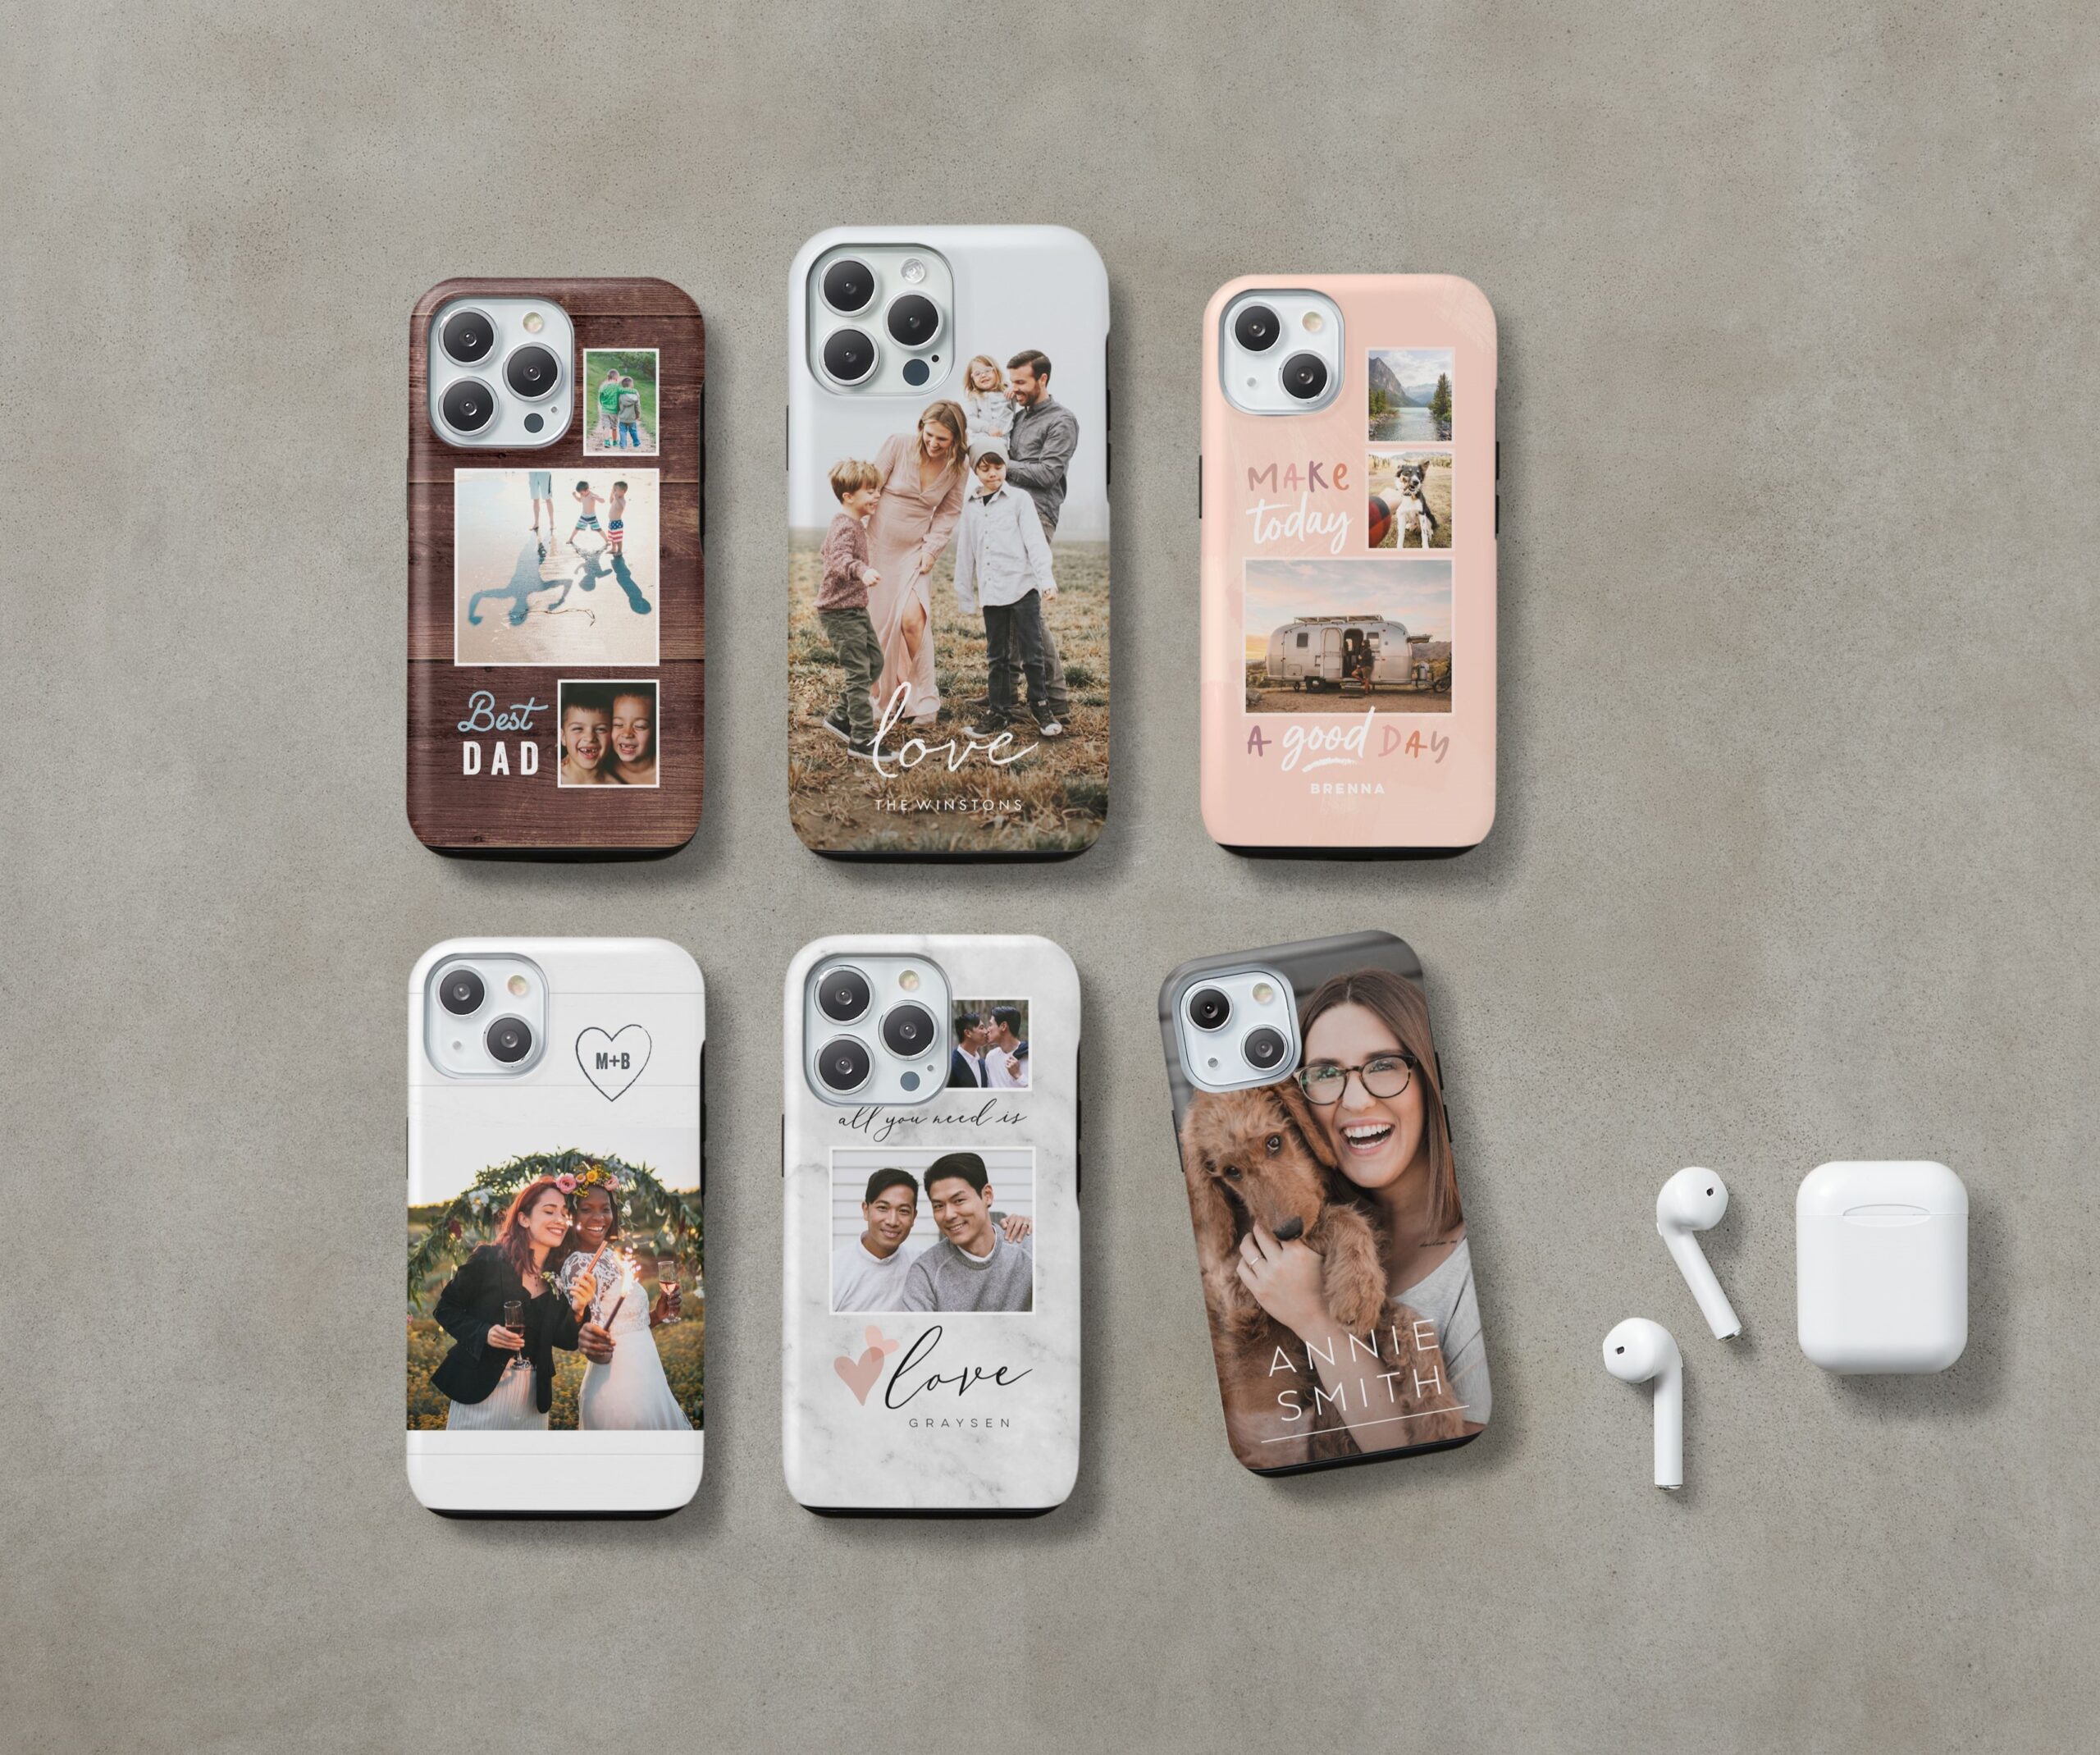
Personalizing With Photos
Personalizing your phone case with photos adds a special touch. It shows your style and memories. Using photos makes your case truly unique. You can carry your favorite moments everywhere. This section explains how to print, cut, and protect your photo on the case.
Printing And Cutting Photos
Choose a photo with good quality and brightness. Use photo paper for best results. Print the photo with a home printer or at a print shop. Make sure the size fits your phone case. Cut the photo carefully with scissors or a craft knife. Follow the shape of your phone case exactly. Clean cuts help the photo look neat and sharp.
Protecting The Photo Layer
Protect the photo to keep it safe from scratches and water. Use clear adhesive film or laminate sheets. Cut the film slightly larger than the photo. Stick it smoothly to avoid bubbles. Another option is to use clear nail polish or resin. Let it dry completely before placing on the case. This step helps your photo last longer and stay bright.
Creative Ideas With Resin
Resin offers endless creative options for making unique phone cases. It is a versatile material that captures colors and objects beautifully. Many crafters love resin for its glossy, glass-like finish. You can customize your case with personal touches that stand out.
With resin, small objects become part of your design. It allows for a clear, protective layer that keeps your decorations safe. The process is simple and fun, perfect for beginners and experts alike.
Embedding Small Objects
Choose tiny items that fit your phone case shape. Dried flowers, glitter, beads, or small charms work well. Place them carefully on the case base before pouring resin. Arrange objects to create a balanced and attractive look.
Pour resin slowly to avoid bubbles. Use a toothpick to push bubbles away if needed. Let the resin cure fully to harden and protect the design. The result is a smooth, shiny surface with your objects inside.
Working With Resin Safely
Always use resin in a well-ventilated space. Wear gloves to protect your skin from irritation. Avoid breathing in fumes by using a mask if possible. Follow the instructions on the resin package carefully.
Keep resin away from children and pets. Clean spills immediately with alcohol or acetone. Store resin containers tightly closed in a cool, dry place. Safety helps you enjoy crafting without risks.
Finishing Touches
Finishing touches give your phone case a professional look. They protect your design and add useful features. These small steps make your case last longer. They also improve the feel and function of your case. Focus on two main areas: protective coats and accessories.
Applying Protective Coats
Protective coats keep your artwork safe from scratches and water. Use a clear sealant spray or brush-on varnish. Make sure it is compatible with your materials. Apply thin, even layers for the best coverage. Let each layer dry completely before adding the next. This prevents smudging and peeling. Protective coats also add a nice shine or matte finish. Choose the finish that fits your style.
Adding Functional Accessories
Accessories make your phone case more useful. Attach a ring holder for a better grip. Stick on a card pocket to carry essentials. Use adhesive strips or glue for secure attachment. Keep accessories lightweight to avoid bulkiness. Position them carefully for comfort and convenience. Small additions can greatly improve your case’s function.
Care And Maintenance Tips
Taking care of your custom phone case helps it last longer and look great. Proper care keeps colors bright and materials strong. Follow easy steps to keep your case clean and handle wear well.
Cleaning Your Custom Case
Use a soft cloth to wipe dirt and dust gently. For tougher spots, dampen the cloth with mild soap and water. Avoid harsh chemicals that can damage the case. Let the case air dry completely before putting it back on your phone.
Handling Wear And Tear
Check your case regularly for scratches or cracks. Small cracks can grow, so fix them quickly if possible. Avoid dropping your phone often to reduce damage. Store your phone in a safe place when not in use.
Credit: www.shutterfly.com
Frequently Asked Questions
How Can I Make A Phone Case At Home?
To make a phone case at home, gather materials like silicone, fabric, or plastic. Use molds or customize old cases. Decorate with paint or stickers. This DIY project saves money and allows creative designs tailored to your style and phone model.
What Materials Are Best For Diy Phone Cases?
Best materials include silicone, thermoplastic polyurethane (TPU), fabric, and resin. Silicone offers flexibility and shock absorption. TPU is durable and scratch-resistant. Fabric cases provide unique textures. Resin allows custom designs. Choose based on your phone model and protection needs.
How Do I Customize My Homemade Phone Case?
Customize by painting, adding stickers, or using decals. You can embed small objects in resin cases. Use fabric or washi tape for patterns. Personalization reflects your style and makes your phone case unique and eye-catching.
Is Making A Phone Case Cost-effective?
Yes, making a phone case is cost-effective. Materials are affordable and reusable. DIY cases avoid brand markup costs. Plus, you can create multiple designs for less than buying new cases. It’s a budget-friendly way to protect your phone.
Conclusion
Making your own phone case is fun and simple. You choose the design and materials. It shows your style and protects your phone. You save money and enjoy creating something unique. Try different colors or patterns to make it yours.
Keep practicing to improve your skills. Soon, you will have many cool cases to use or share. Start today and enjoy the creative process!
As an Amazon Associate, I earn from qualifying purchases.