
Have you ever wondered what happens to the images inside a disposable camera after you finish your roll? Developing disposable camera film might seem like a mystery, but it’s easier than you think—and it can bring your memories to life in a way digital photos just can’t match.
Whether you want to save money, enjoy a hands-on experience, or simply see your snapshots in a new light, this guide will walk you through every step. By the end, you’ll feel confident turning your used disposable camera into beautiful prints you can hold and share.
Ready to discover the magic hidden inside your camera? Let’s get started.
Choosing The Right Disposable Camera
Choosing the right disposable camera is key to getting great photos. Different cameras have different features. Picking one that fits your needs makes the process easier and more fun. This guide helps you understand the options and find the best match for your film developing journey.
Types Of Disposable Cameras
Disposable cameras come in many styles. Some are basic with a simple lens. Others have a flash for low light conditions. Some even have waterproof cases for outdoor use. Choose based on where and how you plan to take pictures. Consider features like flash, focus, and size.
Film Formats And Quality
Most disposable cameras use 35mm film. This film type offers good image quality and is easy to develop. Some older or specialty cameras use different film formats. The quality depends on the film speed (ISO) and the camera lens. Lower ISO films are clearer but need more light. Higher ISO films work better in darker places but may be grainy.
Gathering Essential Supplies
Gathering the right supplies is the first step to develop disposable camera film. Without the proper materials, the process will not work well. Prepare everything carefully to get clear and sharp images from your film.
Developing Chemicals Needed
Four main chemicals are needed to develop film. The developer brings out the images from the film. The stop bath stops the development process quickly. The fixer makes the image permanent and safe from light. Finally, the wash removes all leftover chemicals from the film. Each chemical must be fresh and used in the right amount.
Necessary Equipment And Tools
Several tools help handle the film safely and cleanly. A developing tank holds the film and chemicals without exposing the film to light. Film reels keep the film flat inside the tank. A thermometer checks the temperature of the chemicals. Measuring cups help pour the correct chemical amounts. Gloves protect your hands from chemicals. A timer is useful to track the time for each step.
Preparing Your Workspace
Preparing your workspace is the first step to develop disposable camera film. A clean, organized area helps avoid mistakes. You need a space that blocks out all light during film handling. Also, the room should keep a steady temperature. Small changes can affect your photos.
Setting up a proper workspace makes the process smooth. It protects your film from damage. Let’s see how to prepare your darkroom or changing bag and control light and temperature.
Setting Up A Darkroom Or Changing Bag
A darkroom is a room with no light leaks. It lets you open your film without exposure. If you do not have a darkroom, use a changing bag. This bag is light-tight and has arm holes for you to work inside.
Check the darkroom for any light coming through cracks or windows. Cover any openings with thick cloth or tape. The changing bag should feel sturdy and have no holes. Practice opening your film inside the bag before starting.
Ensuring Proper Lighting And Temperature
Safe light is important if you use a darkroom. Use a red or amber safelight. These colors do not harm black-and-white film. Color film needs total darkness until fixed.
Keep your room temperature between 65°F and 75°F (18°C to 24°C). Warmer temperatures speed up the developing process but can cause grainy photos. Cooler temperatures slow down development and can cause underdeveloped images.
Keep chemicals and film away from direct sunlight. Avoid sudden temperature changes. Prepare everything before you start to avoid mistakes.
Credit: www.cvs.com
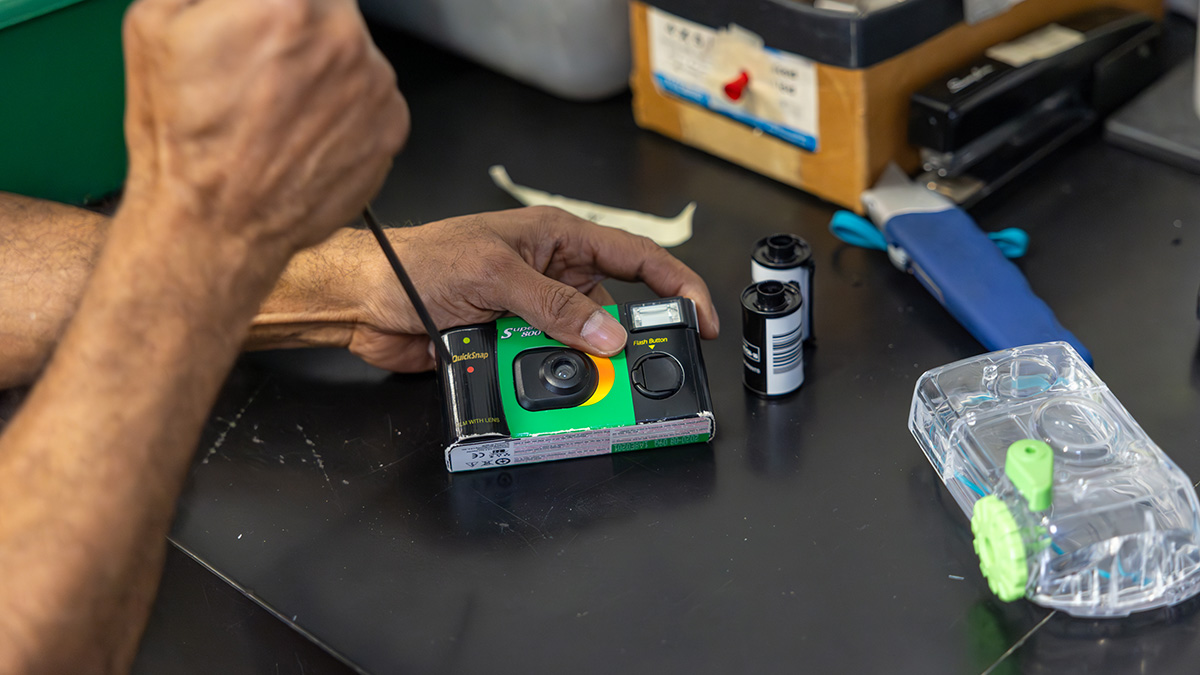
Removing The Film From The Camera
Removing the film from a disposable camera is the first step in developing your photos. It requires care to avoid damaging the film. Handle the camera gently and work in a clean, dry place. Follow simple steps to safely take out the film roll. This ensures your pictures stay protected until development.
Opening The Disposable Camera Safely
Find the camera’s back cover latch. Slide or press it gently to open. Avoid using force to prevent breaking the camera. Open the back in a dim room or cover the camera with a cloth. This protects the film from light, which can ruin your photos. Keep the camera steady while opening the back cover.
Handling The Film Roll
Carefully pull out the film roll by its plastic spool. Do not touch the film surface to avoid fingerprints or scratches. Hold the film by the edges only. Keep the film in a light-tight container or film canister. Store it in a cool, dry place until you are ready to develop. Handle the film with clean, dry hands for best results.
Step-by-step Film Development Process
Developing disposable camera film is a rewarding way to see your photos come to life. The process is simple and can be done at home with basic tools. Follow each step carefully for the best results.
Mixing The Chemicals
Start by preparing the chemicals needed for development. Use developer, stop bath, and fixer. Follow the instructions on each chemical package for exact amounts. Mix chemicals in clean containers with water at the right temperature. Keep everything ready before handling the film.
Developing The Film
Load the film into a developing tank in a dark room or changing bag. Pour the developer into the tank. Gently agitate the tank to ensure even coverage. Wait the recommended time for the film to develop. This step reveals the images captured on the film.
Stopping The Development
Pour out the developer and pour in the stop bath. The stop bath halts the developing process immediately. Agitate the tank gently for about 30 seconds. This prevents the film from overdeveloping and ruining the pictures.
Fixing The Image
After stopping, add the fixer to the tank. The fixer makes the image permanent and removes unexposed silver. Agitate the tank gently for the time listed on the fixer instructions. Finally, rinse the film with clean water to remove chemicals. Let the film dry in a dust-free place.

Credit: www.youtube.com
Washing And Drying The Film
Washing and drying the film is a crucial step in developing disposable camera film. This step removes chemicals and prevents damage to the images. Clean washing and gentle drying keep the film safe and clear.
Proper Washing Techniques
Use clean, cold water for washing the film. Cold water stops the film from getting too soft or damaged. Gently run the water over the film for about five minutes. Avoid touching the film surface with your fingers. Hold the film by the edges only. Make sure all chemicals wash off completely. Check the water color; it should be clear at the end.
Drying Tips To Avoid Damage
Dry the film in a dust-free place. Hang the film using clips on the edges. Avoid direct sunlight to prevent fading. Use a soft cloth to gently pat the edges if needed. Let the film air dry fully, usually for several hours. Do not use heat or blow dryers. Wait patiently for the film to dry before handling or scanning.
Scanning And Printing Your Photos
After developing your disposable camera film, the next step is to bring your photos to life. Scanning and printing your pictures lets you see and share your memories easily. This part is simple and fun. It helps you keep your photos safe and enjoy them anytime.
Digitizing Your Negatives
Digitizing means turning your film negatives into digital images. Use a film scanner or a flatbed scanner with a film adapter. Clean the negatives gently to avoid dust and scratches. Scan at a high resolution for better quality. Save the files in common formats like JPEG or TIFF. This makes it easy to edit or share your photos online.
Printing Options For Stunning Results
Choose the best printing method for your photos. Home printers offer quick and easy prints. Photo labs provide professional quality prints with vibrant colors. Consider the paper type—glossy paper makes colors pop. Matte paper gives a soft, classic look. Pick the size that fits your space or album. Printed photos keep your memories alive and beautiful.
Credit: www.iconla.com
Troubleshooting Common Issues
Developing disposable camera film can sometimes bring unexpected challenges. These issues may affect the quality of your photos. Understanding how to fix common problems helps you get better results. Here are some tips to solve frequent troubles in film development.
Dealing With Over Or Underexposure
Overexposure makes photos too bright. Details in the bright areas may disappear. To fix this, reduce the development time slightly. Use cooler water to slow down the chemical reaction. Underexposure causes dark or blank photos. Increase the development time carefully to bring out details. Avoid too long development as it may cause grainy images. Always test with a small roll first to find the right timing.
Handling Scratches And Dust
Scratches and dust can ruin your photos. They appear as lines or spots on the film. Clean the film gently before and after development using a soft, lint-free cloth. Avoid touching the film surface with your fingers. Use a dust blower to remove particles from the film and scanner. Store film in a clean, dry place to prevent dust buildup. Handle film carefully to avoid scratches during processing.
Tips For Better Disposable Camera Shots
Disposable cameras offer a fun way to capture moments. They bring a unique look that digital cameras cannot copy. To get the best results, some simple tips help. These tips improve your photos and make your memories clearer.
Good lighting and smart composition make a big difference. Also, knowing how to care for your film helps keep pictures sharp. Follow these easy steps to take better photos with your disposable camera.
Lighting And Composition Tips
Natural light works best for disposable cameras. Shoot outdoors or near windows for bright, even light. Avoid harsh midday sun, which creates strong shadows. Early morning or late afternoon light looks softer and warmer.
Keep your subject in the center of the frame. This helps the camera focus better. Use simple backgrounds to avoid distractions. Try to hold the camera steady to prevent blurry pictures. Frame your shot before clicking the button.
Maximizing Film Performance
Store your camera in a cool, dry place. Heat and moisture can damage the film inside. Avoid opening the camera before you finish the roll. This prevents light from ruining your photos.
Shoot at eye level to capture natural perspectives. Use the flash only in low light or indoor settings. Remember, film is sensitive, so avoid extreme light. Handle the camera gently to keep the film safe.
Frequently Asked Questions
How Do I Develop Disposable Camera Film At Home?
You can develop disposable camera film using a DIY film developing kit. Follow instructions for chemicals, timing, and temperature control to get clear images.
What Materials Are Needed To Develop Disposable Camera Film?
You need a film developing tank, chemicals (developer, stop bath, fixer), thermometer, timer, and darkroom or changing bag to develop film.
Can I Use Regular Photo Paper To Print Disposable Film Photos?
No, you must use photographic paper designed for film enlarging. Regular paper won’t capture the image properly.
How Long Does It Take To Develop Disposable Camera Film?
Developing film usually takes about 30 to 60 minutes, depending on chemical types and film speed.
Conclusion
Developing disposable camera film can be simple and fun. Follow the steps carefully for the best results. Use the right chemicals and tools to protect your photos. Take your time and be patient during the process. Practice will help you get better each time.
Enjoy the unique feel of film photography. It brings a special touch to your memories. Give it a try and see the magic yourself.
As an Amazon Associate, I earn from qualifying purchases.
