Is your computer mic not working right when you need it most? Whether you’re trying to join an important meeting, record a podcast, or chat with friends, a faulty microphone can be incredibly frustrating.
But don’t worry—you don’t need to be a tech expert to fix it. You’ll discover simple, step-by-step solutions that anyone can follow to get your mic working perfectly again. Keep reading, and you’ll be back to clear, crisp sound in no time.
Check Hardware Connections
Before diving into software fixes, check the hardware connections of your microphone. A loose or faulty connection often causes mic problems. Ensuring all parts connect well can save time and effort. Start with the basics and follow these steps carefully to find any hardware issues.
Inspect Microphone Plug And Port
Look closely at the microphone plug and the computer’s port. Dust, dirt, or bent pins can block proper contact. Unplug the mic and check both ends. Clean gently with a soft cloth if needed. Plug it back in firmly but without force. A good connection is tight and secure.
Test With Another Device
Try your microphone with a different device. Use another computer or a smartphone with a mic input. This test shows if the microphone itself works. If it does not work elsewhere, the mic may be faulty. If it works fine, the issue likely lies with your computer’s hardware.
Use A Different Cable
Swap the cable that connects your microphone to the computer. Cables can wear out or break inside without visible damage. Using a new or known-good cable helps identify cable problems. Replace the old cable and test the microphone again. This step often fixes connection issues.
Adjust Sound Settings
Adjusting sound settings can fix many microphone problems on your computer. It helps your system recognize and use your mic properly. Simple changes in sound settings often solve low volume or no sound issues.
Set Microphone As Default Device
Open the Control Panel and go to Sound settings. Click the Recording tab to see your microphone list. Find your mic and right-click it. Choose “Set as Default Device” to make it active. This step tells your computer to use this mic first.
Increase Microphone Volume
In the Sound settings, select your microphone again. Click Properties and go to the Levels tab. Move the volume slider to a higher level. Set it around 75 to 90 for clear sound. This change makes your voice louder in recordings and calls.
Disable Audio Enhancements
Audio enhancements can sometimes cause microphone issues. In the microphone Properties window, open the Enhancements tab. Check the box labeled “Disable all sound effects” or “Disable audio enhancements.” Click Apply and OK to save. This stops software from altering your mic’s sound.
Update Or Reinstall Drivers
Updating or reinstalling drivers can fix many microphone problems on your computer. Drivers are small programs that help your mic and computer communicate. If these drivers are outdated or corrupted, the mic may stop working. This section shows easy ways to update or reinstall your mic drivers.
Use Device Manager
Device Manager is a tool on Windows that controls hardware settings. Open it by typing “Device Manager” in the search bar. Find “Audio inputs and outputs” and click to expand. Right-click your microphone and select “Update driver.” Choose “Search automatically for updated driver software.” Windows will look for new drivers and install them. Restart your computer after the update to apply changes.
Download Drivers From Manufacturer
Visit the website of your computer or microphone manufacturer. Find the support or downloads section. Enter your device model to find drivers. Download the latest mic driver for your operating system. Open the downloaded file and follow the instructions to install. Restart your computer to finish the installation. This method ensures you get the correct and latest drivers.
Roll Back To Previous Driver
Sometimes new drivers cause issues. Rolling back can fix this problem. Open Device Manager and find your microphone under “Audio inputs and outputs.” Right-click the device and choose “Properties.” Go to the “Driver” tab and click “Roll Back Driver.” Select a reason and confirm. The computer will restore the older driver. Restart to check if the mic works properly again.

Credit: support.microsoft.com
Check Privacy And Permissions
Checking your computer’s privacy and permissions is a key step to fix microphone issues. Sometimes, the mic does not work because the system or apps do not have the right access. Adjusting these settings can solve many common problems.
Windows and other operating systems have built-in controls to protect your privacy. These controls decide which apps can use the microphone. If the mic is blocked, apps cannot hear you. You must allow permission to use the mic.
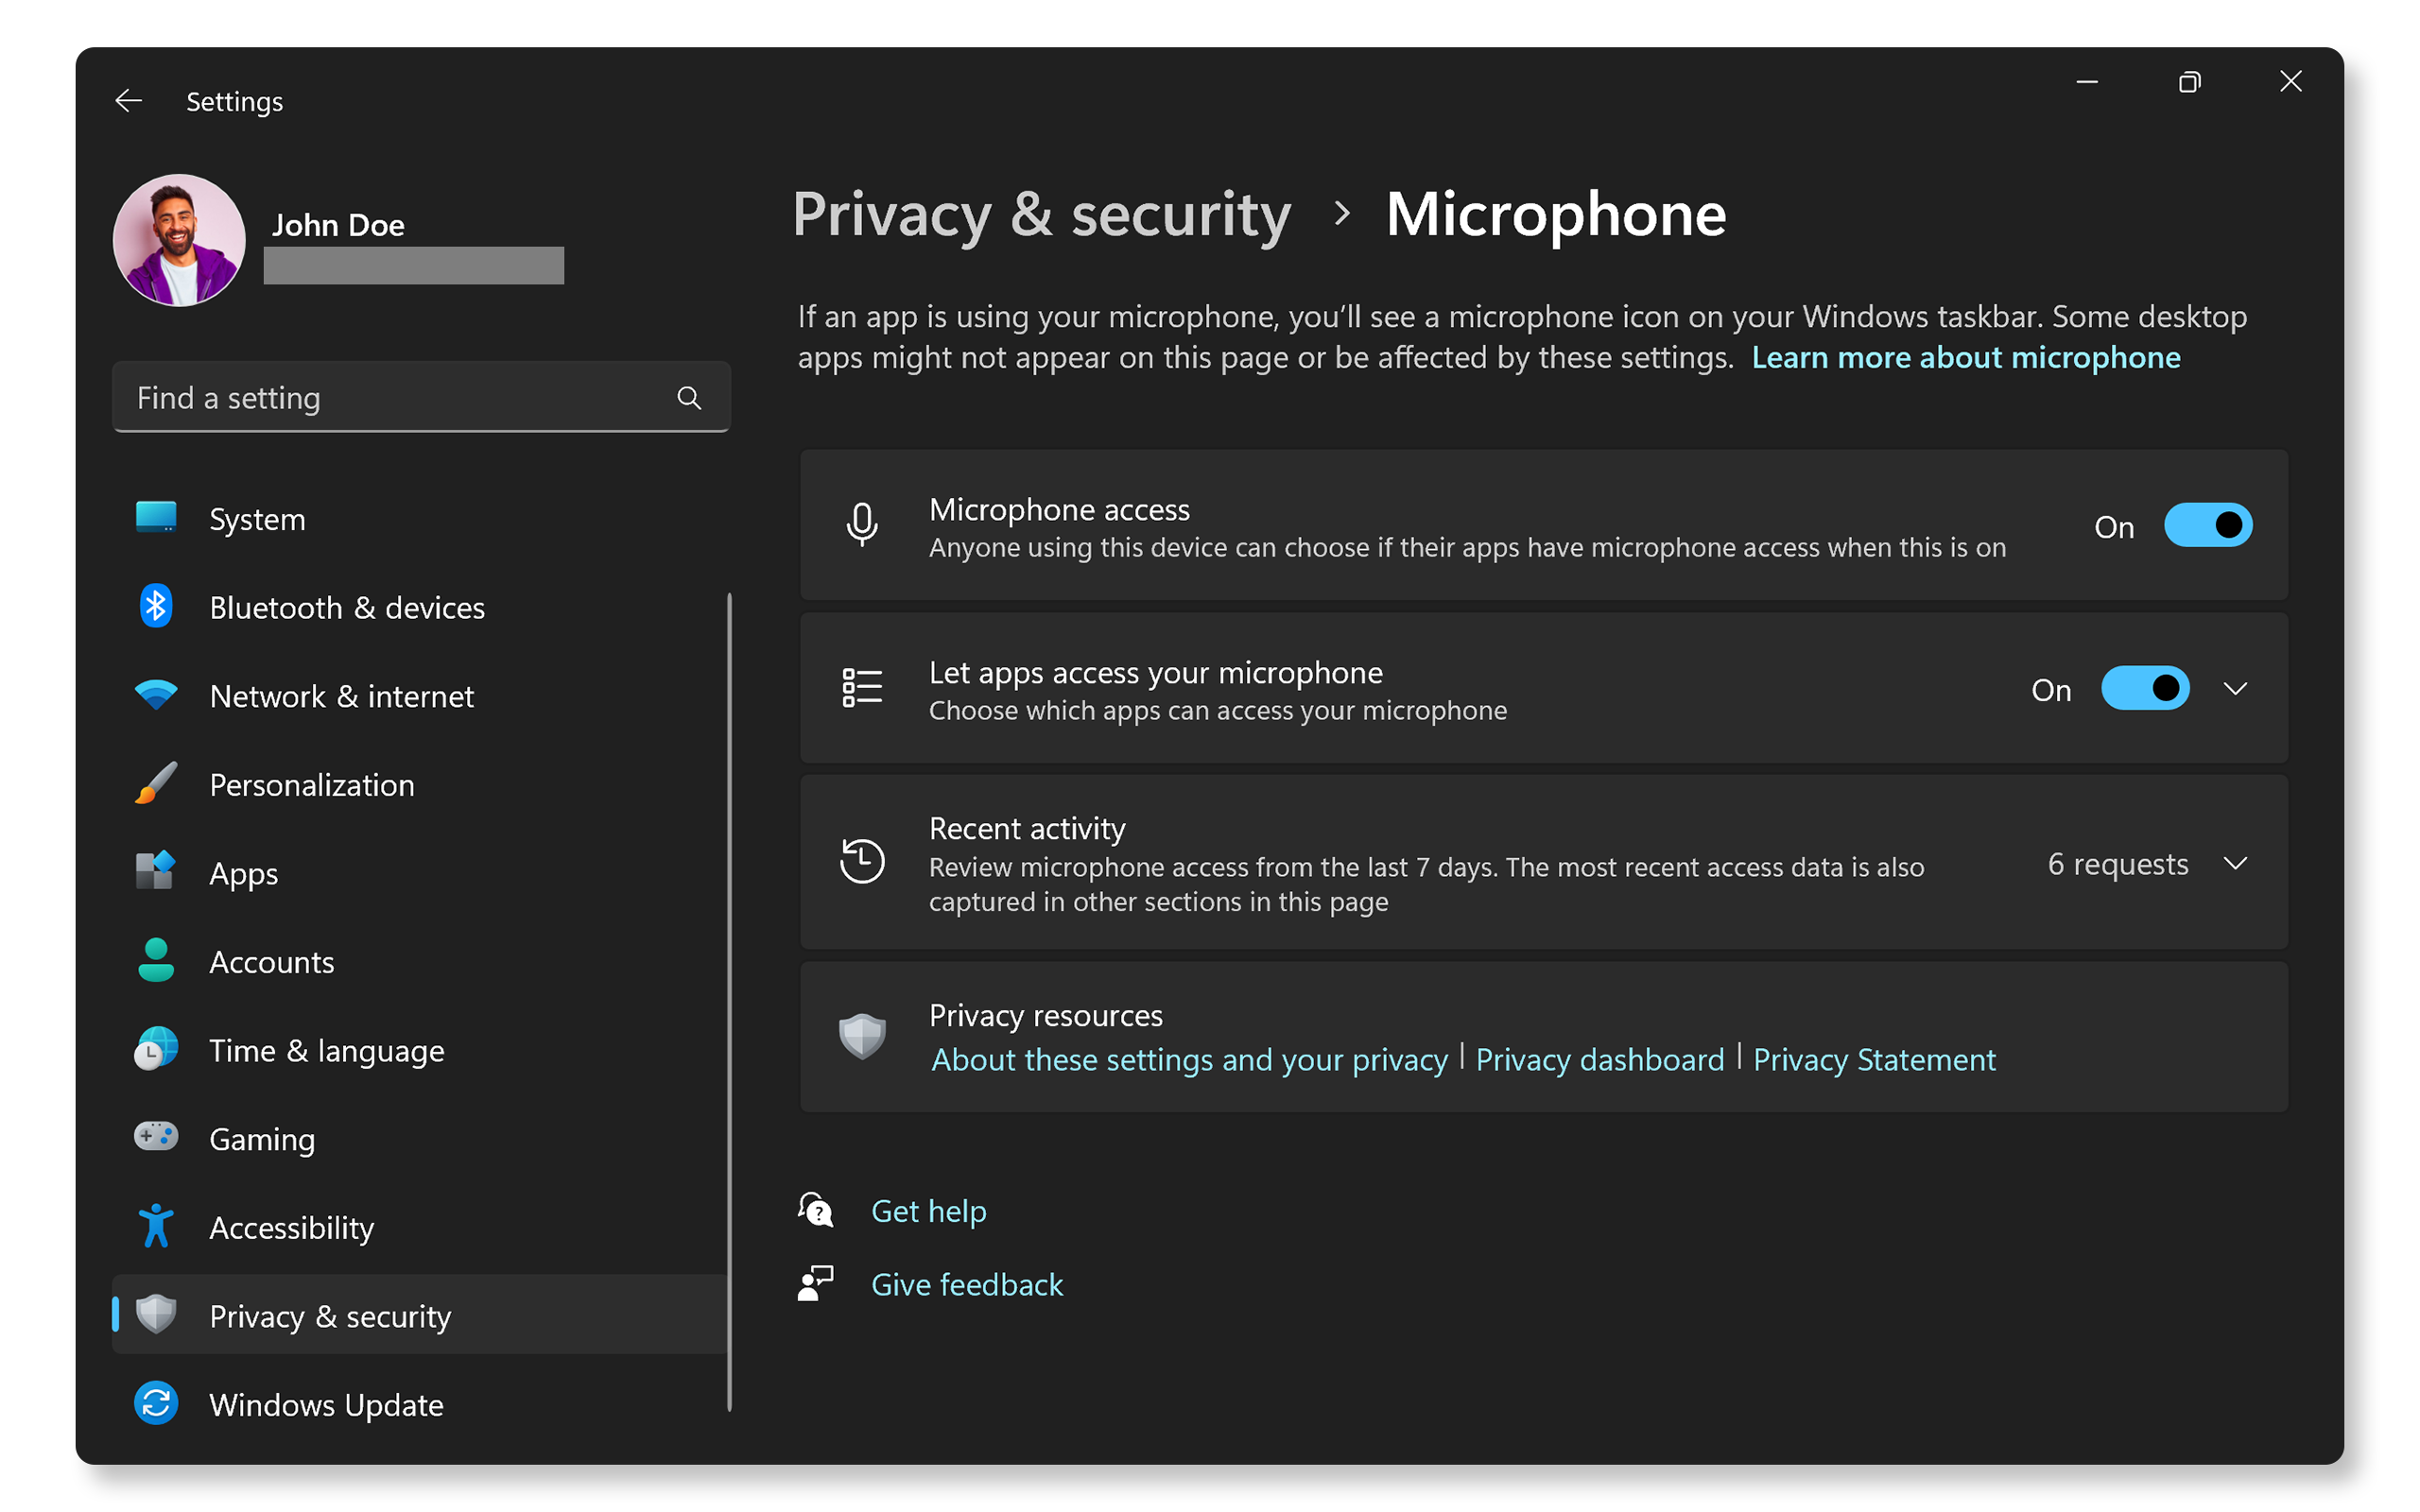
Allow Microphone Access
Go to your system’s privacy settings. Find the microphone section. Turn on the option to allow apps to use the mic. This lets your computer share mic data with programs. Without this, the mic stays silent.
Manage App Permissions
Check which apps can access the microphone. Some apps might be blocked by default. Enable the mic for apps you trust and use. Restrict access to apps you do not want listening. Proper control avoids unnecessary mic usage.
Disable Exclusive Mode
Exclusive mode lets one app take full control of the mic. This can block other apps from using it. Open the microphone properties in sound settings. Find the advanced tab. Uncheck the exclusive mode boxes. This frees the mic for all apps.
Run Troubleshooters
Running troubleshooters is a quick way to find and fix microphone problems on your computer. These tools scan your system for issues and suggest easy fixes. They save time and can solve many common audio problems without technical skills.
Use Windows Audio Troubleshooter
Windows has a built-in audio troubleshooter that checks your microphone settings. Open Settings and go to Update & Security. Click Troubleshoot, then select Additional troubleshooters. Find and run the Recording Audio troubleshooter. Follow the on-screen steps to detect and fix issues. This tool can reset audio settings and update drivers automatically.
Try Third-party Diagnostic Tools
Third-party diagnostic tools offer deeper checks for microphone issues. They often provide detailed reports and extra repair options. Choose trusted software from reputable sources to avoid malware. These tools can test hardware, update drivers, and fix sound configurations. Use them if the Windows troubleshooter does not resolve the problem.
Credit: www.dell.com
Test With Different Applications
Testing your microphone with different applications helps find where the problem lies. Sometimes, the mic works in one app but not in another. This step narrows down the issue quickly. Try simple tools first before moving to complex ones. This method saves time and guides you on what to fix next.
Check Microphone In Voice Recorder
Open the Voice Recorder app on your computer. Speak into the microphone and record a short message. Play it back to hear if your voice is clear. If the recording is quiet or missing, the mic may have hardware or driver issues. This test is basic but effective for quick checks.
Use Communication Apps
Try apps like Zoom, Skype, or Microsoft Teams. These apps use your microphone for calls and meetings. Start a test call or use the built-in audio check feature. Listen for your voice or ask a friend if they can hear you. These apps help test real-time audio and connection problems.
Test Online Mic Check Tools
Visit websites that offer free mic tests. These tools record and play back your voice instantly. They also show if your mic is detected by the system. Online tests work without installing software. They are useful to confirm if the mic is working in browsers and other apps.
Replace Or Repair Hardware
Sometimes, fixing your computer’s mic means dealing with hardware issues. Software fixes may not solve the problem if the mic is damaged. Replacing or repairing the hardware can restore clear sound. This section explains simple hardware solutions for your mic.
Consider External Usb Microphone
Using an external USB microphone is an easy fix. It connects directly to your computer without extra drivers. This type of mic often works better than built-in ones. You can plug it into any USB port and start using it right away. External mics are good for clear voice calls and recordings. They also avoid problems caused by damaged internal mics.
Consult Professional Repair Services
Professional repair services can help if your mic is physically broken. Experts can open your computer and check the microphone hardware. They can replace the broken part or fix loose connections. This option keeps your computer intact and working properly. Repairs might cost less than buying a new device. Trusting professionals ensures safe and proper handling of your hardware.

Credit: www.youtube.com
Frequently Asked Questions
How Do I Check If My Mic Is Working On Pc?
Go to your computer’s sound settings and select the input tab. Speak into the mic and see if the input bar moves. This indicates your microphone is working properly. You can also test it using online mic testing tools for quick verification.
Why Is My Computer Mic Not Picking Up Sound?
Mic issues often arise from muted settings, wrong input selection, or driver problems. Check if your mic is muted or disabled in sound settings. Also, update or reinstall audio drivers. Ensure the mic is properly plugged in or try a different port.
How Can I Fix Mic Not Detected On Windows?
First, check the physical connection and try another USB port. Then, update your audio drivers via Device Manager. Also, verify your privacy settings to allow apps access to the microphone. Restart your PC after making these changes for them to take effect.
What Settings Improve Mic Quality On A Computer?
Adjust microphone levels in sound settings for optimal volume. Enable noise suppression or echo cancellation if available. Position the mic close to your mouth and reduce background noise. Use high-quality drivers and keep your system updated for better audio performance.
Conclusion
Fixing your computer’s mic does not have to be hard. Try simple steps like checking connections and settings first. Restart your device to refresh the system. Update or reinstall audio drivers for better performance. Test your mic after each step to see changes.
Small fixes often solve common mic problems. Keep your device clean and free from dust. Stay patient and follow the guide carefully. Clear sound helps with calls, recordings, and meetings. Your mic can work well again with these tips.
As an Amazon Associate, I earn from qualifying purchases.