
Have you ever needed to capture something important on your Asus laptop screen but didn’t know how? Whether it’s saving a funny moment, preserving important information, or sharing your screen with others, knowing how to take a screenshot is a must-have skill.
In this guide, you’ll learn simple, step-by-step methods to quickly grab screenshots on your Asus laptop. By the end, you’ll feel confident and ready to capture anything on your screen without hassle. Keep reading—you’re just a few clicks away from mastering this useful trick!
Screenshot Methods On Asus Laptops
Press the Print Screen (PrtSc) key to capture your entire screen. The image saves to the clipboard. Open Paint or any editor, then press Ctrl + V to paste. Save the file as an image.
The Snipping Tool lets you select a screen area. Open it from the Start menu. Click New, drag to select the area, then save or copy the snip.
Snip & Sketch is a newer tool. Press Windows + Shift + S to open it. Choose the snip shape, select the area, and it copies to the clipboard. A notification appears to edit or save.
The Windows Game Bar captures screenshots during games or apps. Press Windows + G to open it. Click the camera icon or press Windows + Alt + PrtSc to save a screenshot.
Capturing Full Screen
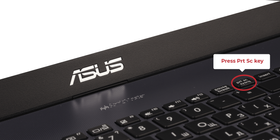
Press the PrtSc (Print Screen) key on your Asus laptop keyboard. This key is usually near the top-right corner. It copies the entire screen image to the clipboard.
Open an app like Paint or Word. Press Ctrl + V to paste the screenshot. Save the file by clicking File > Save As. Choose your preferred file format.
Alternatively, press Windows key + PrtSc. This saves the full screen screenshot automatically in the Pictures > Screenshots folder. Easy and quick!
Capturing Active Window
Press Alt + PrtScn keys together to capture the active window. This copies the screenshot to your clipboard. Open an image editor like Paint or a document program. Paste the screenshot using Ctrl + V. Save the file by choosing File > Save As. Select your preferred format, such as PNG or JPEG.
Remember, only the window you are using gets captured. Other parts of the screen stay hidden. This method works fast and is easy for all users.

Credit: www.asus.com
Capturing Custom Area
Press Windows + Shift + S keys together to capture a custom area. The screen will dim, and a small menu appears at the top. Select the rectangular snip or other snip shapes from the menu. Click and drag your mouse to choose the area you want to capture. Release the mouse button to take the screenshot.
The captured area is saved to the clipboard automatically. Open an app like Paint or Word. Press Ctrl + V to paste the screenshot. You can save or edit the image there.
Saving And Editing Screenshots
After taking a screenshot on your Asus laptop, saving it is easy. Open Paint or any simple photo editor. Paste the screenshot by pressing Ctrl + V. Use basic tools like crop, resize, or draw to change the image.
Many editors let you add text or shapes to highlight parts. Save your edited screenshot as a PNG or JPEG file for good quality.
Windows also offers built-in editing with the Snip & Sketch tool. It allows quick cropping, drawing, and saving. Just open the screenshot in the tool and use the buttons to make changes.
Credit: screenrec.com
Using Keyboard Shortcuts Efficiently
Pressing PrtSc captures the whole screen. This saves it to the clipboard. Paste it in Paint or Word using Ctrl + V.
Alt + PrtSc captures only the active window. It also copies to the clipboard for pasting.
Windows + Shift + S opens a small tool to select a screen area. The screenshot is copied to the clipboard.
To save screenshots automatically, press Windows + PrtSc. Files go to the Pictures > Screenshots folder.
| Shortcut | Action |
|---|---|
| PrtSc | Full screen copied to clipboard |
| Alt + PrtSc | Active window copied to clipboard |
| Windows + Shift + S | Select part of the screen |
| Windows + PrtSc | Save full screen as file |
Some Asus laptops let you change shortcuts. Use software like Asus Keyboard Hotkeys. Set keys to your choice. This helps quick screenshot taking.
Troubleshooting Screenshot Issues
Print Screen key might not work due to keyboard issues. Try pressing Fn + PrtSc or use Windows + Shift + S for the snipping tool. Restarting the laptop can fix temporary problems.
Screenshots might not save if the default folder is full or missing. Check the Pictures > Screenshots folder. Use File Explorer to find saved images. Change the save location if needed.
Permission problems can stop screenshots from saving. Make sure the app has write access to the folder. Adjust settings in Privacy > App permissions. Running the app as administrator can help.

Credit: www.pdfgear.com
Third-party Screenshot Tools
Several free screenshot tools work well on Asus laptops. Lightweight apps like Greenshot and ShareX let you capture screens quickly. They offer easy editing options such as cropping and adding text.
Look for tools with features like region capture, delayed screenshot, and automatic saving. Some apps even let you record your screen as a video.
| Tool | Free | Main Features |
|---|---|---|
| Greenshot | Yes | Region capture, quick editing, easy sharing |
| ShareX | Yes | Multiple capture modes, screen recording, file upload |
| Lightshot | Yes | Simple interface, quick upload, basic editing |
Frequently Asked Questions
How Do I Screenshot On An Asus Laptop Keyboard?
Press the “PrtSc” key to capture the full screen. Paste it into Paint or Word using Ctrl + V. Save your screenshot easily.
Can I Screenshot Only A Part Of My Asus Screen?
Yes, press Windows + Shift + S to open Snip & Sketch. Select the area to capture. The screenshot copies to your clipboard.
Where Are Asus Laptop Screenshots Saved Automatically?
Screenshots taken with Windows + PrtSc save in the Pictures > Screenshots folder. Check this folder to find your images quickly.
How To Screenshot On Asus Laptop Without Using Print Screen?
Use the Snipping Tool app from the Start menu. Choose the screenshot type, capture, and save. It’s a simple alternative method.
Conclusion
Taking screenshots on your Asus laptop is simple and fast. Use the built-in keys or tools to capture your screen easily. Practice a few times to feel comfortable with the steps. Screenshots help save important information quickly. Now, you can share or keep your screen images anytime you need.
Keep this guide handy for future use. Capture, save, and share with confidence.
As an Amazon Associate, I earn from qualifying purchases.

